![]()
Seed Starting Guide: A Comprehensive Handbook for Successful Gardening
Introduction
Starting seeds is a fundamental step for gardeners. It allows you to grow plants from the very beginning. By starting seeds at home, you save money and access a wider variety of plants. This guide will help you master the essentials of seed starting.
Summary and Overview
In this guide, you’ll learn all about seed starting. We’ll cover timing, supplies, and the proper process. Understanding when to start seeds is crucial, especially based on local frost dates. You’ll discover the essential supplies needed, how to start seeds, and how to care for them after planting.
What You Need for Seed Starting
Essential Supplies
To start seeds successfully, gather a few key supplies. First, choose suitable containers. Seed trays, recycled pots, or even egg cartons work well. Ensure they have drainage holes to prevent waterlogging.
Next, use a high-quality seed starting mix. This mix is lighter than regular garden soil, promoting healthy root growth. It retains moisture without becoming soggy, crucial for delicate seedlings. Avoid using garden soil, as it’s often too dense and may harbor pests.
Light is another critical factor. Seedlings need plenty of bright light to grow strong. If natural light is limited, consider investing in grow lights. LED lights are energy-efficient and provide the right spectrum for plant growth.
Investing in grow lights can significantly enhance your seed starting success, especially in low-light conditions. LED grow light bulbs provide the necessary light spectrum for optimal growth.
Finally, keep plant labels handy. These help you track what you’ve planted and when. With these supplies, you’re well on your way to a successful seed starting experience.
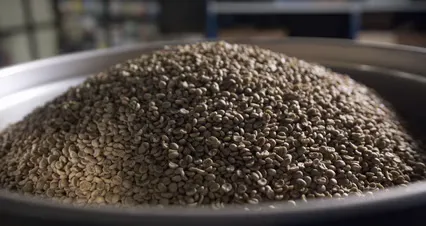
Selecting the Right Seeds
Types of Seeds to Start Indoors vs. Outdoors
Choosing the right seeds can make or break your gardening experience. Some plants thrive when started indoors, while others do better when sown directly into the garden.
Common vegetables like tomatoes and peppers are excellent candidates for indoor starting. These heat-loving plants benefit from a head start. Starting them indoors allows you to enjoy a bountiful harvest earlier in the season. Germination rates for these seeds can be as high as 90% when conditions are just right. Check out this tomato seed pack to get started!
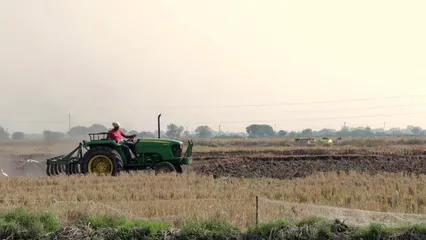
On the other hand, root vegetables like carrots and radishes prefer direct sowing. These crops develop best when they can grow in their final location. They typically have a 75-85% germination rate, which is impressive for seeds that don’t like to be disturbed. If you’re curious about a great option, check out the carrot seed pack!
Consider heirloom seeds for unique flavors and varieties. They often outperform standard seeds in taste and yield. Ready to explore your options? Check out local stores or online shops for heirloom varieties that can enhance your garden. Happy planting!

The Seed Starting Process
Step-by-Step Guide
Starting seeds can be easy and rewarding. Follow these steps to ensure your seeds germinate successfully.
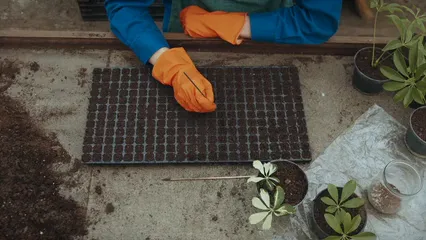
- Prepare Your Containers: Choose seed trays or recycled pots. Ensure they have drainage holes. Clean them with a bleach solution to prevent disease.
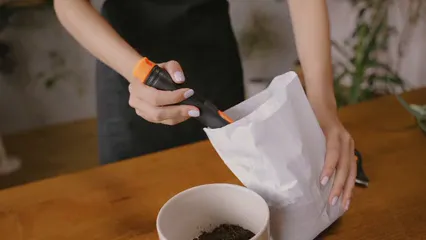
- Select Your Soil: Use a seed-starting mix. This mix is lighter than regular soil, allowing for better root development. Moisten the mix before filling your containers.
- Sow Your Seeds: Plant seeds at the recommended depth according to the seed packet. Generally, plant seeds two to three times as deep as their width. For tiny seeds, simply press them onto the surface.
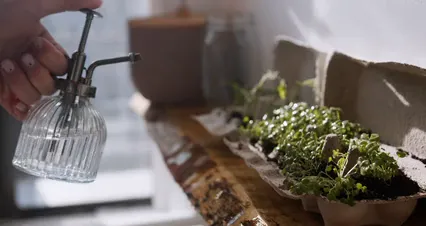
- Watering Techniques: Bottom watering is effective. Place containers in a shallow tray of water. The soil will absorb moisture from the bottom, keeping seeds undisturbed. Mist the top with water if needed.
- Light Requirements: Seedlings need 12-16 hours of light daily. If natural light is insufficient, use grow lights. Position them 2-4 inches above seedlings.
- Temperature Control: Most seeds germinate best at 65°F to 75°F. Consider using a heat mat for seedlings for heat-loving plants like peppers and tomatoes.
- Monitor Moisture: Keep the soil consistently moist but avoid overwatering. Check daily and adjust as needed.
- Fertilizing: Once seedlings develop true leaves, begin feeding with a diluted liquid fertilizer every two weeks.
- Potting Up: If seedlings outgrow their containers, transplant them into larger pots for continued growth.
- Harden Off: Before moving seedlings outdoors, gradually acclimate them to outdoor conditions over 7 to 14 days. Start with a few hours in the shade, increasing their exposure to sunlight each day.
Following these steps will set you on the path to a successful gardening season. Enjoy the thrill of watching your seeds grow into thriving plants!
Caring for Seedlings
Post-Germination Care
Congratulations! Your seeds have sprouted, and it’s time to nurture those little green beings. Seedlings need specific care to thrive. This phase is crucial for their growth.
First, let’s talk about watering. Keep the soil consistently moist but not soggy. Bottom watering works wonders! Place your seedlings in a tray of water, allowing the soil to absorb moisture. This method prevents disturbing the fragile roots.
Next, identify true leaves. These are the second set of leaves that appear. Once true leaves form, it’s time to start fertilizing. Use a diluted liquid fertilizer every two weeks. This gives your seedlings the nutrients they need to grow strong and healthy.
Light adjustments are also essential. Initially, seedlings need around 12 to 16 hours of light daily. As they grow, gradually increase light exposure. If you’re using grow lights, keep them 2-4 inches above the seedlings. This prevents them from getting leggy.
Humidity levels matter too. Maintaining a humid environment can help prevent transplant shock. You can cover your seedlings with a humidity dome for seedlings for the first week, then gradually remove it to acclimate them to the drier air.
Watch out for common issues like “damping off.” This fungal disease thrives in overly moist conditions. To prevent it, ensure good air circulation around your seedlings. A small fan for air circulation can help.
Document your seedling journey! Share your progress on social media. It’s a great way to connect with fellow gardeners and gather tips. Your seedlings are a reflection of your hard work, so celebrate their growth!
Hardening Off Seedlings
Preparing for Outdoor Transplanting
Hardening off your seedlings is essential before moving them outside. This process gradually acclimates them to outdoor conditions. It helps prevent transplant shock, which can harm your precious plants.
Start by exposing seedlings to outdoor conditions for a few hours each day. Begin with a spot that offers shade. Each day, increase their exposure to sunlight and wind. The typical duration for this process is about 7 to 14 days. This gradual exposure makes a big difference!
Look for signs that your seedlings are ready for transplanting. Healthy seedlings have strong stems and several true leaves. They should feel sturdy and not too leggy. If your seedlings show these signs, they are primed for their new home in the garden.
As you approach transplanting, check local weather forecasts. Planning your transplanting schedule based on weather will ensure the best conditions for your seedlings. This way, you can avoid unexpected frost or harsh winds that could damage them.
Encourage readers to take this time seriously. Proper hardening off sets the stage for a thriving garden!
Please let us know what you think about our content by leaving a comment down below!
Thank you for reading till here 🙂
All images from Pexels


