![]()

How to Plant Potatoes: A Comprehensive Guide
Introduction
Potatoes are one of the most beloved vegetables worldwide. Their versatility makes them perfect for countless dishes. Growing your own potatoes is surprisingly easy, even for beginners. With just a little effort, you can enjoy the satisfaction of harvesting fresh potatoes right from your garden.
Summary and Overview
Potatoes are not just tasty; they’re also packed with nutrients. They provide essential vitamins and minerals, making them a staple food in many diets. Potatoes can be categorized into two main types: early and maincrop. Early potatoes mature quickly, while maincrop varieties take longer but yield more.
Preparing the soil is crucial for healthy potato growth. Choose quality seed potatoes to ensure a successful harvest. The growth cycle involves four key stages: planting, caring, harvesting, and storing. Growing potatoes at home offers several benefits, including fresher produce and the joy of gardening. Plus, there’s nothing quite like a home-cooked meal featuring your own potatoes!

Types of Potatoes
Understanding Potato Varieties
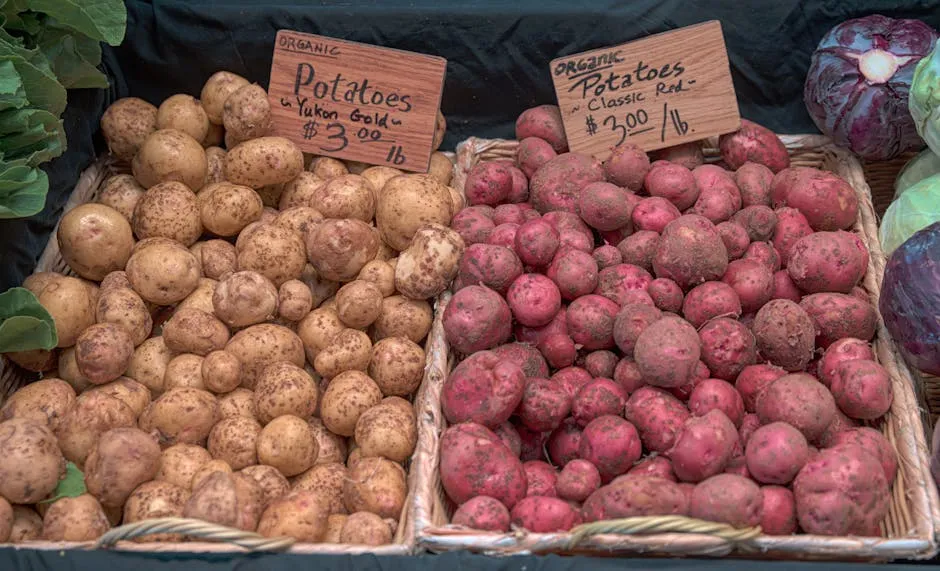
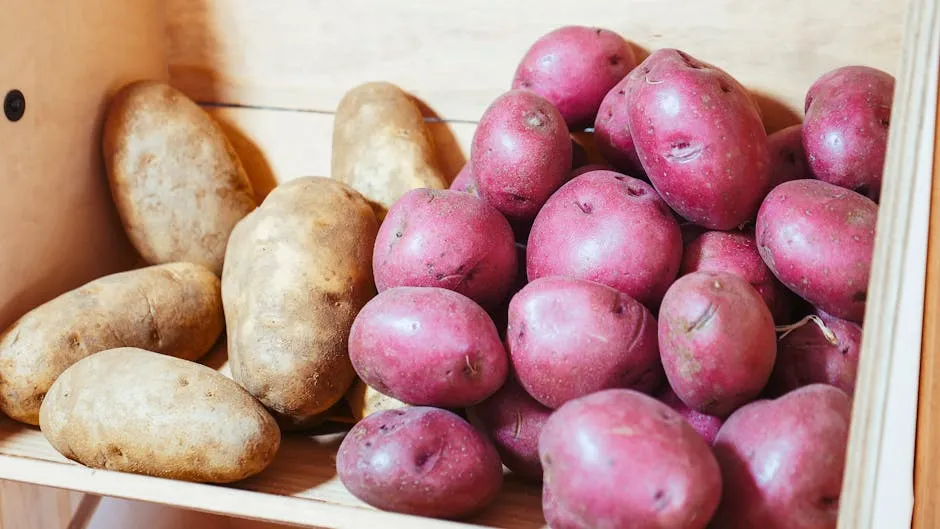
When planting potatoes, it’s important to know the different types available. First Early potatoes mature quickly, typically ready for harvest in June and July. Second Early varieties follow closely behind, harvested in July and August. Maincrop potatoes are harvested from late summer to autumn and are ideal for storage.
Common varieties include Yukon Gold, known for its buttery flavor, and Russets, which are perfect for baking. Red Bliss have a creamy texture, making them great for salads, while Purple potatoes offer a unique visual appeal and a slightly nutty taste. Each type has its own cooking methods, so choose according to your culinary needs.
When to Plant Potatoes
Timing Your Planting
When should you plant potatoes? The answer varies based on your climate. In cooler regions, plant potatoes 2 to 4 weeks before the last frost. For warmer areas, you can start as early as mid-March.
Soil temperature is key. Potatoes prefer soil temperatures of about 45-50°F. If the soil is too cold, your potatoes may not sprout.
Frost dates matter, too. Knowing your local last frost date helps in planning. For many, this means planting in early spring. However, you can also plant late summer. This late planting can lead to a winter harvest if protected from frost.
Here’s a quick planting calendar:
- Northern Regions: Late April to early May
- Central Regions: Mid-April to late April
- Southern Regions: March to early April
Understanding these details ensures a successful potato crop. If you’re looking for an easy way to plant and grow your potatoes, consider using a Potato Growing Bag. They are perfect for those with limited space and help ensure a successful harvest!
Preparing for Planting
Soil Preparation
Preparing your soil is crucial for potato growth. Potatoes thrive in well-drained, loose soil. If your soil is heavy clay, mix in compost to improve texture. Consider using compost to enhance your soil quality.
Soil amendments can boost nutrient levels. Adding compost not only enriches the soil but also improves drainage. Consider using fertilizers with a high phosphorus content, which encourages tuber development. An organic fertilizer can work wonders for your potato plants.
Aim for a soil pH between 5.0 and 6.5. You can test your soil using a soil testing kit. If your pH is too high, add sulfur to lower it.
Creating mounds or trenches helps. Mounding soil around your potato plants keeps them covered and protects developing tubers from sunlight. It also aids in moisture retention.
Good preparation sets the stage for a bountiful harvest.

Choosing and Preparing Seed Potatoes
Selecting the Right Seed
Choosing the right seed potatoes is vital. Always opt for certified seed potatoes. Grocery store potatoes might be treated to prevent sprouting, which can hinder growth. You can find quality Yukon Gold or Russet Burbank seed potatoes for the best results.
Chitting, or pre-sprouting, is beneficial. Place seed potatoes in a cool, light area for a few weeks until they sprout. This process gives your potatoes a head start.
When cutting seed potatoes, ensure each piece has at least one eye. Aim for pieces the size of a golf ball. Allow cut pieces to cure for a couple of days before planting. This curing process helps prevent rot.
Position the eyes upwards when planting. This simple step encourages healthy growth. With the right seeds and preparation, you’re set for success.
Planting Techniques
How to Plant Potatoes
Planting potatoes is straightforward, whether you use trenches, hills, or containers. Here’s how to do it effectively.
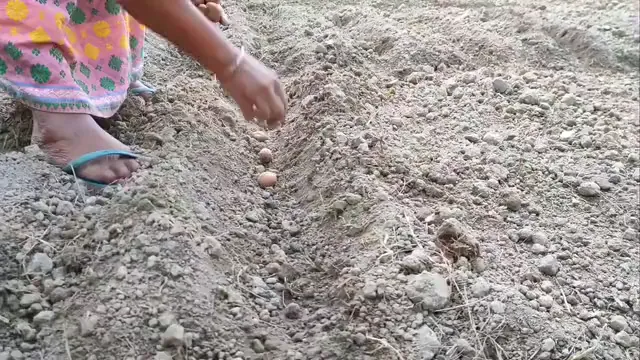
1. Trenching Method
Start by digging a trench about 6 inches deep. Space your trenches 2-3 feet apart. For each potato piece, ensure you leave 12 inches between them. Place the seed potatoes in the trench with the eyes facing up. Cover them with about 2 inches of soil. Water them well after planting.
2. Hilling Method
The hilling method involves planting potatoes in mounds. Create mounds of soil about 8-12 inches high. Plant the seed potatoes at the base of the mound, spaced 12 inches apart. As the plants grow, add more soil around the base. This technique helps prevent sunlight exposure, which can green the potatoes.
3. Container Growing
For limited spaces, use large containers or grow bags. Fill the container with potting soil, leaving a few inches at the top. Plant the seed potatoes about 6 inches deep, spacing them 12 inches apart. As they grow, add more soil to cover the stems. This method also allows for easy pest control.
Spacing and Depth
Different potato types require specific spacing. First earlies should be spaced 12 inches apart, while maincrop types need about 15 inches. Plant seed pieces 4-6 inches deep for earlies and 6-8 inches for maincrops.
Watering Immediately After Planting
Water your potatoes right after planting. This ensures the soil settles around the tubers. Consistent moisture is essential, especially in the first few weeks. Aim for about 1 inch of water per week.
Soil Coverage
After planting, ensure the seed potatoes are adequately covered. This protects them from pests and sunlight. As the plants grow, continue to hill soil around the stems. This practice promotes tuber growth and helps retain moisture.
By following these steps, you’ll set your potato plants up for a successful growing season. Don’t forget to equip yourself with a garden fork for an easier harvest!
Caring for Your Potato Plants
Maintenance and Growth
Caring for your potato plants is vital for a bountiful harvest. Here’s how to ensure they thrive.
Watering Needs
Potatoes require consistent watering. Aim for 1-2 inches of water weekly, particularly during dry spells. If the plants show signs of wilting, they might need more water. Watch for droopy leaves or yellowing, as these indicate stress.
Earthing Up
As your potato plants grow, earthing up is essential. When the plants reach about 6-8 inches tall, mound soil around the base. This method prevents sunlight from reaching the tubers, avoiding greening. Repeat this process every few weeks until the plants flower. This practice can significantly boost your yield.
Pest Control Strategies
Monitor your plants for pests like aphids and Colorado potato beetles. Handpicking is effective for small infestations. Consider using row covers to protect young plants. If pests persist, organic insecticidal soap can help.
Implementing effective pest control is crucial for healthy potato plants. Learn more about organic pest control methods.
Organic Methods
Using organic methods is a great way to manage pests and diseases. For instance, planting marigolds can deter nematodes. Additionally, rotating crops each year helps prevent disease buildup in the soil.
Disease Prevention
Potato blight is a common issue. Prevent it by ensuring good air circulation around plants. Avoid overhead watering, as wet leaves can promote blight. Remove any infected foliage immediately to stop the spread.
Weeding Techniques
Weeds compete with your potato plants for nutrients and water. Regularly check for weeds and remove them by hand or with a hoe. Mulching around the plants can also help suppress weed growth.
Taking these steps will help your potato plants grow strong and healthy, leading to a fruitful harvest. Make sure to document your progress with a gardening journal to keep track of your successes!
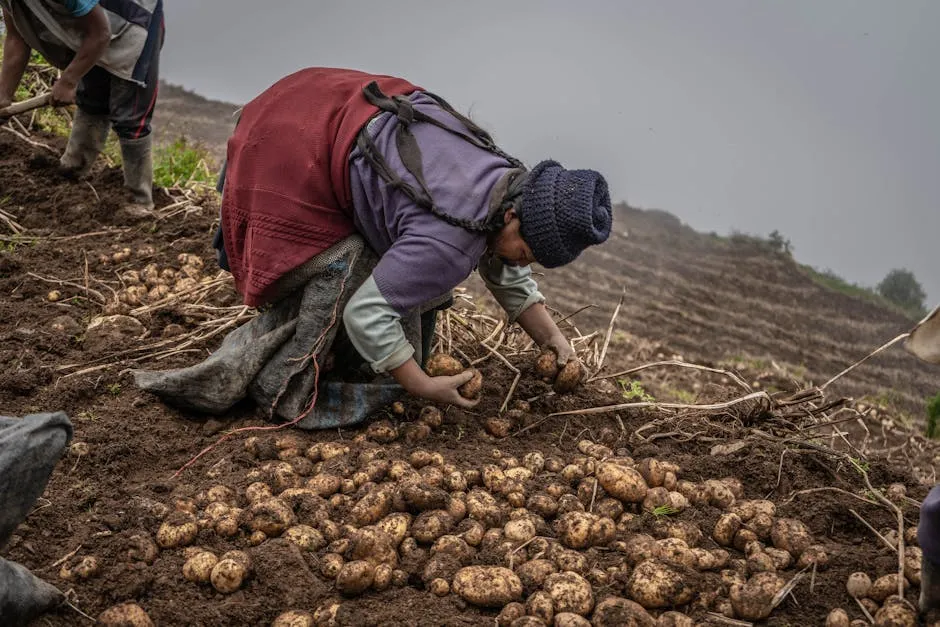
Harvesting Potatoes
When and How to Harvest
Harvesting potatoes is an exciting time. Knowing when and how to do it right is crucial.
Signs of Readiness
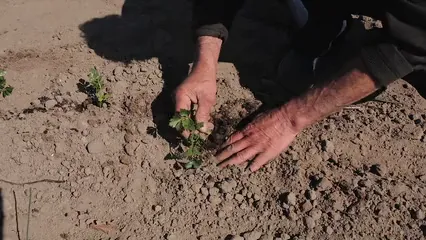
Potatoes are ready for harvest when the foliage begins to yellow and die back. Typically, this occurs 70-120 days after planting, depending on the variety. For baby potatoes, check about two weeks after the plants flower.
Techniques for Careful Harvesting
To avoid damaging the tubers, gently loosen the soil around the plant with a garden fork. Carefully lift the potatoes out of the ground. Be cautious not to puncture them, as this can lead to rot.
Timing for Baby vs. Mature Potatoes
If you’re after baby potatoes, harvest them early. They should be about the size of a hen’s egg. For mature potatoes, wait until the plants have completely died back. This allows the skins to firm up, improving storage quality.
Tools for Harvesting
A garden fork or shovel works best for digging up potatoes. Use a small trowel for container-grown potatoes. Always wear gloves to protect your hands from rough soil.
What to Do Post-Harvest
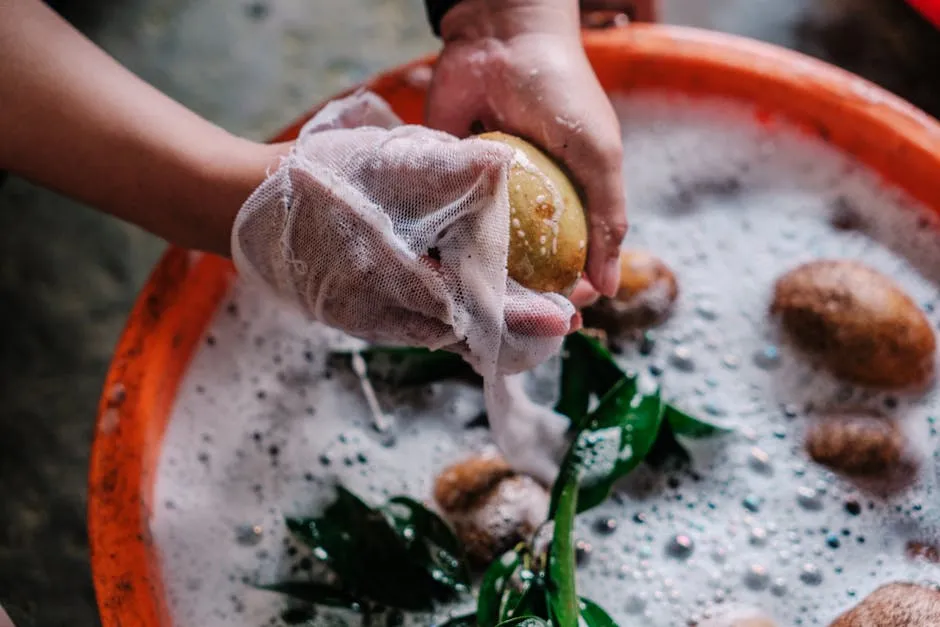
After harvesting, let the potatoes dry on the ground for a few hours. This helps toughen their skins. Avoid washing them until you’re ready to use them. Store in a cool, dark place to prolong shelf life.
Following these tips will ensure you enjoy a successful potato harvest. Don’t forget to store your harvest in burlap potato storage bags to keep them fresh longer!
Storing Potatoes
Optimal Storage Conditions
Once you’ve harvested your potatoes, it’s time to store them properly. First, curing is essential. Place your freshly harvested potatoes in a dark, cool place for about two weeks. This process helps toughen their skins and enhances their storage life.
For long-term storage, keep potatoes in a cool, dark environment. Aim for a temperature between 38°F and 40°F. Ideal humidity levels should be around 90%. This balance prevents shriveling.
To prevent sprouting, avoid storing potatoes in light. Use burlap sacks or cardboard boxes for ventilation. Check stored potatoes regularly for any signs of rot. Remove any affected tubers immediately to protect the rest.
With these guidelines, you can enjoy your potatoes for months to come! For those who love cooking, consider investing in a cooking thermometer to ensure your potatoes are cooked to perfection!
Troubleshooting Common Problems
Dealing with Challenges
Growing potatoes can come with its share of challenges. Common pests include aphids and the notorious Colorado potato beetle. Both can damage your crop significantly. To combat these pests, inspect your plants regularly. Handpicking is effective for small infestations. You can also use row covers to protect young plants.
Potato blight is another common issue. This fungal disease causes dark spots on leaves and stems. To prevent blight, practice crop rotation. Avoid planting potatoes in the same spot for at least three years. This method helps break the disease cycle.
Maintaining healthy soil is crucial. Test your soil regularly to check pH levels, aiming for a slightly acidic range (5.0 – 6.5). Healthy soil promotes strong plants, reducing their vulnerability to pests and diseases. By addressing these common problems, you can enjoy a bountiful potato harvest! And for those who want to keep their garden organized, consider plant labels for easy identification!
Conclusion
Growing potatoes at home is incredibly rewarding. Not only do they taste better, but they also save you money. Plus, there’s something special about digging up your own crop. It connects you with nature and provides a sense of accomplishment.
I encourage you to give it a try! Whether you have a backyard or a small balcony, potatoes can thrive in various spaces. Start small and enjoy the process. If you want to take your gardening to the next level, consider using a raised garden bed kit for a more organized planting environment!
For more tips, check out gardening books or local workshops. If you’ve grown potatoes, I’d love to hear about your experiences. Please share in the comments below!
FAQs
What are the best potato varieties for beginners?
Easy-to-grow varieties include Yukon Gold, Red Pontiac, and Fingerling. Yukon Gold is creamy and versatile. Red Pontiac offers a nice texture, while Fingerling is fun and unique. These choices are forgiving for new gardeners.
How do I know when my potatoes are ready to harvest?
Look for yellowing leaves and dying foliage. Typically, this occurs 70 to 120 days after planting. For baby potatoes, check two weeks after the plants flower. Mature potatoes need the foliage to completely die back.
Can I grow potatoes in containers?
Yes! Use large pots or bags with good drainage. Fill with potting mix and plant as you would in the ground. Ensure they receive ample sunlight and water regularly.
What should I do if my potato plants develop yellow leaves?
Yellowing leaves can indicate overwatering or nutrient deficiencies. Check soil moisture and consider fertilizing. If the issue persists, inspect for pests or diseases.
Is it necessary to chit seed potatoes before planting?
Chitting is beneficial but not essential. It encourages earlier growth and can lead to a higher yield. If you skip this step, just ensure you plant healthy seed potatoes.
How do I prevent pests from damaging my potato plants?
Use organic methods like companion planting or natural insecticides. Regularly inspect your plants and remove pests by hand. Crop rotation also helps prevent infestations.
Why are my potatoes small after harvest?
Small potatoes can result from overcrowding, poor soil conditions, or insufficient watering. Ensure proper spacing and maintain consistent moisture for better growth.
Please let us know what you think about our content by leaving a comment down below!
Thank you for reading till here 🙂
All images from Pexels


