![]()
How to Successfully Grow Tomatoes in Small Balcony Containers
Introduction
Growing tomatoes on a small balcony is like hosting a delicious garden party in a confined space. With a little planning and care, you can transform your balcony into a thriving tomato haven, regardless of how tight the space may be. Imagine plucking ripe, juicy tomatoes straight from your pots, adding a burst of flavor to your summer salads, and impressing your friends with your green thumb—all without needing a sprawling garden.
Tomatoes are not only a popular choice for home gardeners but are surprisingly easy to grow in small spaces. They require minimal equipment, and with the right approach, you can enjoy fresh produce right at your fingertips. For an excellent start, consider using Miracle-Gro Potting Mix for healthy growth and flourishing plants.
To start, ensure your balcony gets enough sunlight. Tomatoes adore sunshine and require at least six to eight hours of direct light daily. This is essential for producing sweet, flavorful fruits. If your balcony doesn’t get enough sun, consider using reflective surfaces, like mirrors or light-colored walls, to enhance light exposure.
Now, let’s talk about varieties. Opt for compact varieties or bush-type tomatoes specifically bred for container gardening. Think ‘Tiny Tim’ or ‘Patio’ tomatoes. These plants grow smaller yet yield a delightful harvest, perfect for your small space. You can find Tiny Tim Tomato Seeds for that perfect balcony garden.
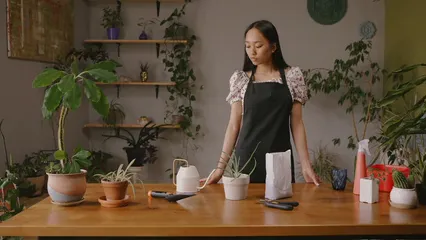
Don’t forget about soil and containers! Use pots that are at least 12-20 inches wide and deep, with good drainage. High-quality potting mix is essential for healthy growth. A mixture rich in nutrients will help your tomatoes thrive.
In this article, we’ll take you through the essential steps to ensure your balcony tomatoes thrive, from selecting the right varieties to perfecting your care routine. Get ready to dig in!

Summary
Growing tomatoes in small balcony containers not only beautifies your living space but also provides you with fresh produce right at your fingertips. This guide will take you through the key steps of successful tomato cultivation on a balcony, including selecting appropriate varieties, preparing the right soil, and establishing proper care routines.
Key Points:
- Assess Your Balcony: Ensure your balcony receives at least 6-8 hours of direct sunlight daily.
- Choose the Right Variety: Opt for determinate or compact varieties that are suited for container gardening, such as ‘Tiny Tim’, ‘Patio’, or cherry tomatoes.
- Container Selection: Use pots that are at least 12-20 inches in diameter with good drainage to promote healthy root growth.
- Soil Preparation: Use high-quality potting soil rich in nutrients. Consider adding organic fertilizer for vegetables for enhanced fertility.
- Sowing Seeds: Start seeds indoors before transplanting or purchase healthy seedlings to ensure robust growth.
- Watering and Fertilizing: Maintain consistent moisture without overwatering, and fertilize regularly with a balanced organic fertilizer.
- Pruning and Support: Regularly prune your plants to encourage air circulation and install supports for taller varieties.
- Pest Management: Monitor for pests and diseases, using organic methods to keep your plants healthy.
Curious about how each step unfolds? Let’s dive deeper into the art of balcony tomato gardening to turn your small space into a lush tomato paradise!

Assessing Your Balcony
Sunlight Requirements
Tomatoes are sun-loving plants. They thrive when basking in sunlight for at least six to eight hours each day. This golden glow is vital for their growth and fruit production. Without enough sunlight, your tomatoes may turn into sad, green imposters instead of juicy red delights.
To maximize light exposure on your balcony, observe how sunlight moves throughout the day. If your balcony is partially shaded, consider relocating your pots to sunnier spots. You can also use reflective surfaces like mirrors or light-colored walls to bounce sunlight onto your plants. Every little bit helps!
If your balcony is shaded by nearby buildings or trees, don’t despair. You can still grow tomatoes! Look for compact varieties that can tolerate less sunlight, such as cherry tomatoes. Just remember, the more sun they get, the happier they’ll be. So, roll up those sleeves, and let the sun be your ally in the quest for homegrown tomatoes!

Choosing the Right Tomato Variety
Determinate vs. Indeterminate
When it comes to tomatoes, choosing the right variety can make all the difference. There are two main types: determinate and indeterminate. Determinate varieties are compact and stop growing when fruit sets. They’re perfect for small spaces and often produce a single harvest. Examples include ‘Roma’ and ‘Patio’ tomatoes. You can find Roma Tomato Seeds to get started!
On the other hand, indeterminate varieties keep growing and producing throughout the season. They require more maintenance and support, making them less ideal for small balconies. Think of varieties like ‘Cherokee Purple’ or ‘Green Zebra’—beautiful but demanding! You can easily find Cherokee Purple Tomato Seeds for a unique taste!
For container gardening, opt for compact or determinate varieties. ‘Tiny Tim’ and ‘Bush Early Girl’ are excellent choices. They’re small, bushy, and produce plenty of delicious fruits without taking up too much space. With the right variety, your balcony can become a mini tomato paradise!
Preparing the Container and Soil
Container Size and Type
Selecting the right container is crucial for tomato success. Aim for pots that are at least 12 to 20 inches in diameter. This size allows ample space for roots to spread and ensures healthy growth.
When it comes to materials, you have options! Plastic pots are lightweight and retain moisture, while terracotta pots offer a classic look but can dry out quickly. Fabric pots are also great—they provide excellent airflow to the roots, promoting healthy growth. Just make sure your containers have drainage holes to prevent soggy soil!

Soil Composition
The soil you choose is just as important as the container. High-quality potting mix is a must. It should be rich in nutrients and offer good drainage. Avoid using garden soil, as it can compact and harm your plants. For an extra boost, consider adding organic bone meal to enrich your soil.
Consider enhancing your potting mix with organic amendments like compost or well-rotted manure. These additions boost fertility and improve soil structure, helping your tomatoes thrive. A little extra care in selecting the right container and soil will pave the way for a bountiful tomato harvest!
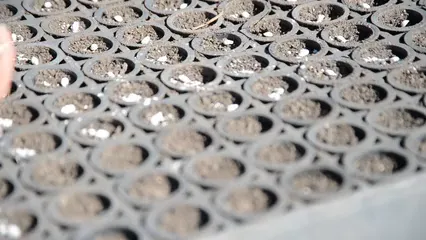
Sowing the Seeds
Starting from Seeds vs. Seedlings
When it comes to tomato gardening, you can either start from seeds or buy seedlings. Each option has its perks and quirks. Starting from seeds gives you a wider variety to choose from. You can pick heirloom seeds or specific hybrids that suit your taste. Plus, it’s cost-effective! However, this method requires patience and a bit of finesse. You’ll need to sow seeds indoors, usually in March or April, and monitor them closely until they sprout.
On the flip side, purchasing seedlings is like fast-tracking your tomato adventure. Seedlings are already established, reducing the risk of failure. You can see what you’re getting, and they offer a head start in growth. But, they can be pricier, and your variety choices may be limited. If you decide to go the seedling route, look for healthy options like Green Zebra Tomato Seeds.
If you opt for seeds, plant them in small pots filled with a quality potting mix. Keep them in a warm, sunny spot. Water them gently but regularly. Once your seedlings reach about 4 to 6 inches tall and have several true leaves, it’s time for the big move! Transplant them outdoors after the last frost, ensuring the soil temperature is warm enough for their little roots.
Transplanting requires care. Dig a hole deep enough to bury the stem up to the first set of leaves. This encourages a robust root system. After transplanting, cover the soil with mulch to retain moisture and suppress weeds. Whether starting from seeds or seedlings, both paths can lead to a fruitful tomato harvest!
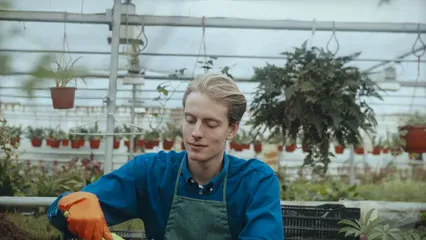
Plant Care
Watering Techniques
Watering your tomato plants is crucial, but it’s an art and a science! Aim for consistent moisture without turning your pots into swimming pools. A good rule of thumb is to check the soil’s top inch. If it feels dry, it’s time for a drink. On hot days, you might need to water daily. Early morning or late evening is the best time to water. Avoid the scorching midday sun; your plants will thank you!
Overwatering can lead to root rot, while underwatering causes stress. Keep an eye out for yellowing leaves or wilting; these are signs your plants are thirsty. Conversely, if leaves are browning and mushy, you might be drowning them. Don’t forget about drainage! Ensure your containers have holes to prevent waterlogging.
Fertilizing Your Plants
Fertilization is the secret sauce for happy tomatoes! Regular feeding boosts growth and fruit production. Start fertilizing when flowers appear. Use a balanced organic fertilizer rich in phosphorus and potassium. These nutrients support flowering and fruit development. A fantastic choice is Tomato Plant Food to ensure your plants get the nutrients they need.
Fertilize every 4-6 weeks during the growing season. Compost is a fantastic option; it enriches the soil naturally. Alternatively, consider fish emulsion or bone meal for a nutrient boost. When applying fertilizer, always follow the product’s instructions to avoid overwhelming your plants. A little goes a long way in the tomato world!

Pruning and Maintenance
Pruning Techniques
Pruning is like giving your tomato plants a stylish haircut! It’s essential for maintaining airflow and promoting healthy growth. Start by removing suckers, the small shoots that grow between the main stem and branches. This encourages your plant to focus on producing fruit instead of extra foliage.
Timing is key! Prune in the morning when the plants are hydrated. Remove any dead or yellowing leaves to keep your plant healthy. Regular pruning improves airflow, reducing the risk of disease. For the best results, use a sharp pair of pruning shears to make clean cuts.
Don’t worry about being too aggressive; tomatoes are resilient! Just remember, a well-pruned plant is a happy plant. It will reward you with a bountiful harvest of delicious, juicy tomatoes. Plus, it keeps your balcony looking tidy and chic!

Pest and Disease Management
Growing tomatoes on your balcony can be a delightful challenge, but pests and diseases may try to crash the party. Common culprits include aphids, whiteflies, and spider mites. These tiny troublemakers can sap your plants’ strength—not a good look for your precious tomatoes! Additionally, watch for fungal diseases like blight or powdery mildew, which can spoil your harvest faster than you can say “salsa.”
To combat these pests and diseases organically, embrace the power of nature. Start by introducing beneficial insects like ladybugs and lacewings. They feast on aphids and other pesky pests. You can also create a welcoming environment for these helpful critters by planting companion plants, such as marigold seeds. These flowers attract good bugs while repelling the bad ones.
For more direct action, consider using a homemade insecticidal soap made from water and mild dish soap. Spray it on the affected plants to knock those pests off their perch. Just remember to do a patch test first. If you’re dealing with fungal issues, a mixture of water and baking soda can work wonders as a preventive measure.
Incorporating these organic solutions can keep your tomato plants healthy and thriving, ensuring your balcony garden remains a vibrant source of fresh produce. After all, you want your tomatoes to shine, not to be a buffet for unwanted guests!

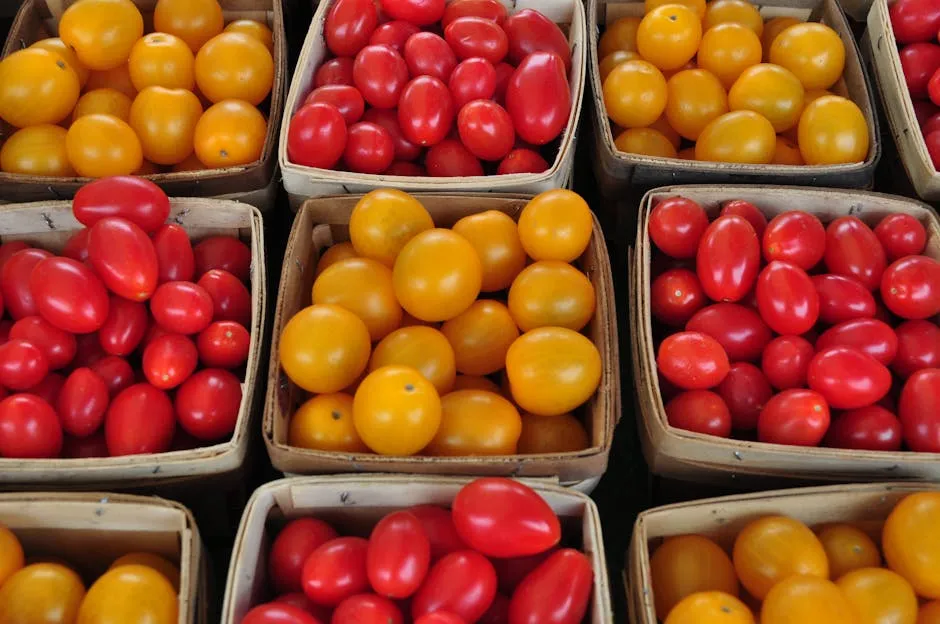
Harvesting Your Tomatoes
When and How to Harvest
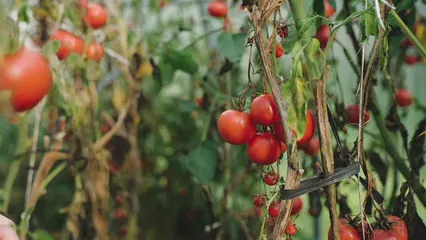
Ah, the moment every gardener dreams of—harvesting your tomatoes! Knowing when to pick them is key to enjoying their juicy goodness. Look for that dreamy deep color and a slight give when you gently squeeze them. If they feel firm as a rock, they’re not quite ready for their grand debut.
Timing is crucial here. Most tomato varieties take about 60 to 80 days from planting to harvest. Check them regularly as they approach maturity. You’ll want to harvest them when they are fully colored and slightly soft to the touch. It’s like a tomato dance party, and you want to join in just as the music peaks!
When it’s time to harvest, be gentle. Use pruning shears to snip the fruit from the vine. This method prevents any damage to the plant, allowing it to keep producing more tomatoes. A little care goes a long way!
If you’re picking a large batch, gather them in a basket but avoid piling them too high to prevent bruising. After all, the goal is to enjoy your homegrown tomatoes at their best. With these tips in mind, your balcony will be bursting with the joy of fresh, homegrown tomatoes in no time!
Conclusion
Growing tomatoes on your balcony can be a rewarding and fulfilling endeavor. By selecting the right varieties, providing adequate care, and using the right techniques, you can enjoy a bountiful harvest of fresh, homegrown tomatoes. Picture yourself savoring the taste of sun-ripened tomatoes in salads, sauces, or simply on their own.
So gather your supplies, roll up your sleeves, and embark on your balcony gardening adventure. With patience, a little humor, and a dash of curiosity, your small space can flourish into a vibrant tomato paradise. Don’t forget to keep your tools organized with an outdoor storage container for gardening tools to keep everything neat and tidy!

FAQs
Can I grow tomatoes in smaller pots?
Yes, you can! The minimum pot size should be at least 12 inches in diameter for optimal growth. Compact or determinate varieties are your best friends here. Consider ‘Tiny Tim’, ‘Patio’, or cherry tomatoes. These varieties thrive in smaller containers and still produce delicious fruit. Remember, a little space goes a long way when you choose wisely!
What should I do if my tomatoes aren’t producing fruit?
If your tomatoes are being dramatic and refusing to bear fruit, it could be a few things. First, check if they’re getting enough sunlight. They need at least 6-8 hours of direct sunlight daily. Next, ensure you’re not over-fertilizing. Too much nitrogen can lead to lush leaves but no tomatoes. Lastly, consider the watering routine; inconsistent watering can also affect fruit production. A little TLC will coax those fruits out!
How often should I water my container tomatoes?
Watering is crucial! Check the top inch of soil; if it’s dry, it’s time to water. In hot conditions, daily watering may be necessary. However, during cooler or rainy weather, adjust accordingly. Ensure water drains well—no one likes soggy roots! A well-watered tomato plant is a happy tomato plant!
Are there any specific pests to watch for?
Absolutely! Keep an eye out for aphids, spider mites, and whiteflies. These tiny pests can wreak havoc on your tomato plants. Look for sticky residue or tiny webs on your leaves as signs of infestation. Regularly inspect your plants and use insecticidal soap or neem oil to keep these uninvited guests at bay. Prevention is key—keep your plants happy and healthy!
Can I grow tomatoes year-round on my balcony?
Growing tomatoes year-round is possible, but it requires some finesse. In colder months, consider moving your containers indoors or using a greenhouse. Look for varieties that can handle cooler temperatures, like certain cherry tomatoes. Just remember, tomatoes love warmth and sunshine, so provide ample light indoors. With the right conditions, you can enjoy fresh tomatoes even in winter!
Please let us know what you think about our content by leaving a comment down below!
Thank you for reading till here 🙂
For more tips on maximizing your small space for gardening, check out these container gardening ideas for small spaces.
All images from Pexels


