
How to Design a Rain Garden for Water Conservation
Introduction
Rain gardens are more than just a trendy landscaping feature. They are shallow depressions designed to collect and absorb rainwater runoff. Picture a small oasis in your yard that helps Mother Nature do her job! These gardens play a crucial role in water conservation, reducing stormwater runoff, filtering pollutants, and boosting biodiversity. Who wouldn’t want to help the environment while sprucing up their yard?
The beauty of rain gardens is that they address several environmental issues at once. By capturing rainwater, they prevent it from rushing into storm drains and polluting our waterways. Instead, the water soaks into the ground, replenishing groundwater supplies. Plus, they create habitats for birds, butterflies, and other wildlife.
This article aims to provide you with a comprehensive guide on designing and building your very own rain garden. Get ready to make a positive impact on your local ecosystem while enjoying a stunning landscape!
What is a Rain Garden?
Definition
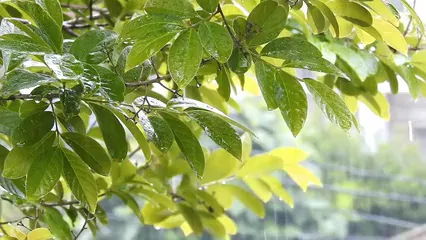
A rain garden is a carefully crafted shallow depression in the ground. Its primary purpose? To collect and absorb rainwater runoff from roofs, driveways, and other impervious surfaces. Think of it as a sponge for your yard, soaking up water that would otherwise create puddles or run off into storm drains.
Purpose
Rain gardens serve a vital function in stormwater management. They help reduce flooding, alleviate drainage issues, and mitigate stream bank erosion. By allowing rainwater to infiltrate the soil, these gardens maintain the health of local ecosystems. Additionally, they filter out harmful pollutants, keeping our rivers and lakes cleaner. It’s a win-win for both your yard and the environment!
Components
A rain garden consists of three main components: inflow, basin, and overflow.
- Inflow: This is where the rainwater enters the garden. It could be a downspout or a natural drainage area.
- Basin: The heart of the rain garden! This shallow depression holds water temporarily, allowing it to soak into the soil. The basin should be filled with a mix of soil that promotes good drainage and supports plant growth.
- Overflow: During heavy rainfall, excess water needs a way out. The overflow directs water safely away from your home and foundation, preventing any potential flooding.
By understanding these components, you can create a rain garden that is not only functional but also enhances the beauty of your landscape. So, let’s get started on designing your eco-friendly oasis!
Benefits of Rain Gardens
Environmental Benefits
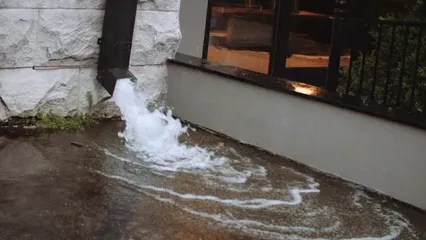
Rain gardens aren’t just pretty patches of greenery; they’re eco-warriors! By capturing rainfall, these gardens help reduce flooding and erosion. When storms hit, rainwater often rushes off impervious surfaces, causing water levels to rise and leading to potential flooding. Rain gardens act like sponges, soaking up that excess water and giving it a place to go. This not only lessens the chance of floods but also protects our soil from erosion.
But wait, there’s more! Rain gardens play a crucial role in enhancing water quality. They filter out pollutants and debris before they can reach local waterways. Think of them as nature’s very own water treatment plants. Pollutants like oils, fertilizers, and pesticides are trapped in the soil instead of flowing into rivers and lakes. This purification process results in cleaner water entering our ecosystems, making rain gardens a win-win for both the environment and our communities.

Aesthetic and Social Benefits
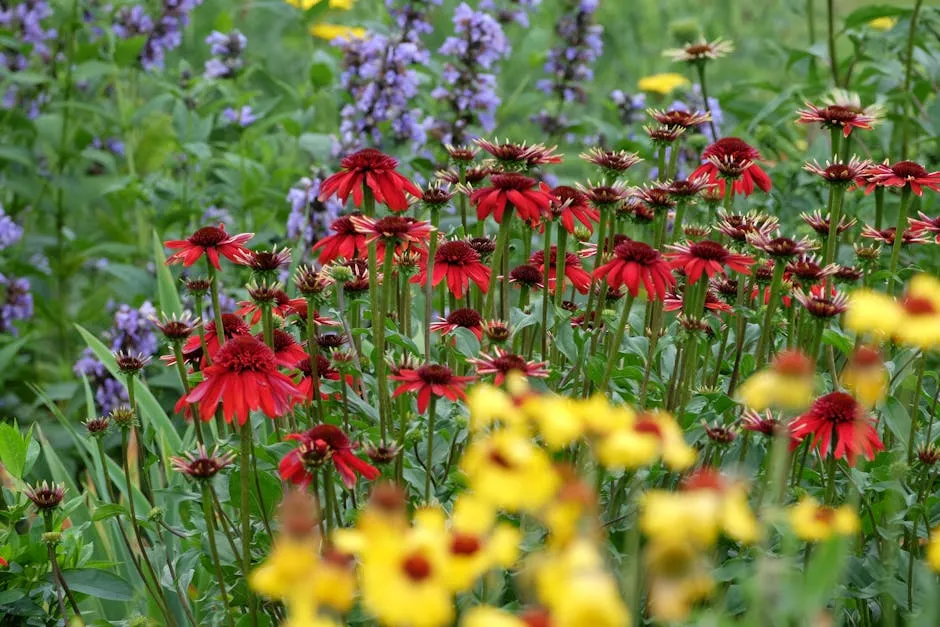
Rain gardens can transform your yard into a vibrant, nature-friendly paradise. They enhance landscape aesthetics with a beautiful array of plants, colors, and textures. Picture a garden that blooms with wildflowers while providing a safe haven for butterflies and birds. It’s like hosting an outdoor party for nature!
Moreover, rain gardens foster community involvement and education. They provide a perfect opportunity for neighbors to come together and learn about water conservation. Community workshops can spring up, where locals are invited to help plant and maintain these gardens. It’s an excellent way to build relationships while contributing to the environment. Plus, who doesn’t love a good excuse for some fresh air and gardening?
By creating rain gardens, we can beautify our neighborhoods, engage with our communities, and make a positive impact on the environment. It’s truly a multi-faceted approach to sustainable living that benefits everyone!
Planning Your Rain Garden
Site Selection
Choosing the Right Location
Finding the perfect spot for your rain garden is crucial. Look for low-lying areas where water naturally collects after rain. Ideally, you want it to be at least ten feet away from your home’s foundation to prevent any water damage. This distance ensures that your garden can do its job without risking your basement from unwanted moisture.
Consider your downspouts too! Redirecting them towards your rain garden can help channel water effectively. Aim for a location that’s not too steep, as flat areas allow for better water absorption.

Assessing Soil Conditions
Ah, soil—the unsung hero of every garden! Before you start digging, assess your soil conditions. The type of soil can significantly affect how well your rain garden functions. Conduct a simple percolation test: dig a hole, fill it with water, and see how quickly it drains. Ideally, the water should soak in within 12 to 48 hours. If it takes longer, you may need to amend the soil to improve drainage.
Understanding your soil type—whether clay, sandy, or loamy—will help you select the right plants and ensure your rain garden thrives. After all, happy plants make for a happy garden!

Size Considerations
Calculating the right size for your rain garden is crucial. A good rule of thumb? Aim for 5-15% of the area of the impervious surfaces—think roofs, driveways, and patios—contributing to the runoff. This percentage ensures your garden can effectively absorb and filter the water.
So, how does this work in practice? Let’s say your roof, along with some paved pathways, totals 1,000 square feet. To find the ideal size for your rain garden, simply take 5-15% of that total. This means your rain garden should be between 50 and 150 square feet. Easy, right?
To make it even simpler, you can use online tools like Google Maps to measure your impervious surface area. Just zoom in on your property, trace the edges, and voilà! You have your measurements. This method is helpful for planning and ensuring your rain garden has enough space to do its job.

Designing Your Rain Garden
Designing your rain garden is like creating a masterpiece—only instead of a canvas, you have soil, plants, and water! Let’s break it down into key elements that will make your rain garden both functional and beautiful.
Garden Design Elements
Shape and Style
Shapes matter! Rain gardens can take on various forms, like oval, rectangular, or even kidney bean. Each shape can complement different landscape styles. An oval garden can soften sharp edges in a yard, while a rectangular one might suit a more formal landscape. Choose a shape that aligns with your existing garden aesthetics, and don’t hesitate to get creative!

Plant Selection
Now, let’s talk plants. The right selection is vital. Opt for native plants that thrive in both wet and dry conditions. Why? Native plants have adapted to local weather patterns and soil types, making them better at handling fluctuations in moisture. They also attract beneficial insects and birds, adding to your garden’s overall biodiversity.
Consider plants like Black-eyed Susans or Swamp Milkweed. They are not only beautiful but also perfect for rain gardens. Plus, they’ll thrive while soaking up that precious rainwater.
For a comprehensive guide on the best native plants for your rain garden, check out Native Plants for Rain Gardens: A Practical Guide. This book is filled with tips on selecting the best plants that will thrive in your garden while attracting local wildlife.

Layering and Soil Amendments
Creating the perfect rain garden involves layering. Think of it like building a delicious cake, where each layer serves a purpose.
- Drainage Substrate: Start with a layer of sand or gravel. This helps excess water drain away easily.
- Soil: Next, add a mix of compost and topsoil. This nutrient-rich layer supports plant growth while allowing water to percolate.
- Plants: Arrange your chosen plants based on their moisture needs. Place thirstier plants in the center and drought-tolerant ones around the edges.
- Mulch: Finally, top everything off with a 2-3 inch layer of organic mulch. This keeps moisture in and weeds at bay.
By following these steps, you’ll create a rain garden that not only looks stunning but functions effectively, conserving water and enhancing your landscape. Happy gardening!

Aesthetic Enhancements
Designing a rain garden isn’t just about function; it’s a chance to let your creative juices flow! By adding decorative elements, you can transform this eco-friendly feature into a stunning focal point in your yard.
- Rocks and Stones: Consider incorporating a variety of rocks and stones. They not only help with water management but also add texture. Use larger stones at the garden’s entrance to guide the eye. Smaller pebbles can line the edges, creating a natural border. Plus, they provide a great place for critters to hang out.
- Seating Areas: Why not extend your rain garden into a cozy nook? A small seating area can make your garden a perfect retreat. A couple of benches or chairs nestled among the plants allow you to enjoy the beauty of your creation. Imagine sipping your morning coffee while listening to the gentle trickle of rainwater!
- Garden Art: Add a touch of whimsy with garden art. Think of colorful birdhouses or playful sculptures peeking through the foliage. These elements invite curiosity and spark conversations. They can also attract beneficial wildlife, enhancing your garden’s ecosystem.
- Pathways: Creating pathways with stepping stones or mulch can enhance accessibility and add structure. Plus, they guide visitors through your garden, allowing them to appreciate the plants and decorations up close. It’s a great way to make your rain garden a delightful spot for strolls.
- Wildlife-Friendly Features: Incorporate birdbaths or native plant clusters to attract local wildlife. This not only beautifies your garden but also supports biodiversity. Watching butterflies flutter or birds splash adds a dynamic element to your space.
By blending these aesthetic enhancements, your rain garden will shine as both a functional and visually appealing feature. You’ll create a sustainable oasis that adds charm while helping the environment. So, roll up your sleeves, unleash your creativity, and let your rain garden reflect your personality!
Building Your Rain Garden
Step-by-Step Guide
- Marking and Digging: Start by outlining the area for your rain garden. Use string or spray paint to define its shape. Aim for a depth of about 6 to 8 inches. This depth allows for ample water absorption while preventing overflow. Digging can be a bit of a workout, so make it a fun family activity! Just keep an eye out for any hidden utility lines.
- Creating a Berm: Once the digging is done, use the soil you removed to form a berm on the downhill side of the garden. This berm acts as a barrier, directing overflow safely away from your home. Make sure it’s well-shaped and compacted to prevent erosion. Think of it as a protective hug for your garden!
- Soil Preparation: Mix your soil components for optimal water absorption. A blend of compost, sand, and topsoil works wonders. This mix ensures good drainage while providing nutrients for your plants. Spread about 6-12 inches of this mix across the bottom of your garden, ensuring it’s level. Remember, happy soil equals happy plants!
- Planting: Now comes the fun part—planting! Choose a variety of native plants that thrive in both wet and dry conditions. Arrange them based on their moisture needs: place thirstier plants in the center and drier ones around the edges. This arrangement creates a natural gradient, which looks great and functions well. Water your plants thoroughly after planting to help them settle in.
- Mulching and Maintenance: Finish off your rain garden with a 2-3 inch layer of mulch. Mulch retains moisture, suppresses weeds, and adds a polished look. Regular maintenance is essential! Keep an eye on your plants, pulling weeds and adding mulch as needed. Water during dry spells, especially for newly planted seedlings. Your rain garden will thrive with just a little TLC!
Following these steps will help you create a rain garden that not only conserves water but also enhances your landscape. With careful planning and a sprinkle of creativity, you’ll have a beautiful oasis that benefits both the environment and your home. So grab your gardening gloves, and let’s get to work!

Maintenance and Troubleshooting
Maintaining a rain garden is essential for its health and effectiveness. Regular upkeep ensures that it continues to serve its purpose while looking fabulous. Let’s break down the essential tasks and common issues you might encounter.
Regular Maintenance Tasks
- Watering: Rain gardens usually thrive on natural rainfall. However, during dry spells, a little extra love in the form of watering is vital. Aim for a deep soak once a week if the weather is particularly dry. Your plants will thank you! Best practices for watering container gardens
- Weeding: Weeds can be sneaky little devils, competing with your native plants for water and nutrients. Regularly check your garden for unwanted guests and pull them out by the roots to prevent them from taking over.
- Mulching: A 2-3 inch layer of organic mulch keeps moisture in the soil and helps suppress those pesky weeds. Plus, it adds a polished look to your garden. Refresh the mulch every spring to keep everything looking spiffy.
- Monitoring: Monitor your plants for any signs of stress. Yellowing leaves? That could be a sign of overwatering or pest issues. Keeping an eye on your plants helps you catch problems early, ensuring your rain garden thrives.

Common Issues and Solutions
- Standing Water: If you notice puddles lingering longer than 48 hours after a rain, it could mean your soil is compacted or not draining well. To fix this, consider amending the soil with sand or compost to improve drainage. You might also need to dig deeper to create a more effective basin.
- Pests: While rain gardens attract beneficial insects, they may also invite unwanted pests. Regularly checking your plants for signs of infestations—like holes in leaves or sticky residue—can help you take action early. Use natural pest control methods, like introducing ladybugs or using insecticidal soap, to keep the balance in your garden.
- Aesthetic Maintenance: Overgrown plants can obscure the garden’s beauty. Prune any overgrown stems and divide perennial plants as needed to maintain a healthy, vibrant look.
By staying on top of maintenance and addressing issues as they arise, your rain garden will flourish, contributing positively to water conservation and enhancing your landscape.

Conclusion
Rain gardens offer a multitude of benefits, from conserving water to beautifying your landscape. They are a fantastic way to manage stormwater runoff, reducing flooding and protecting local waterways. Not to mention, they create habitats for wildlife, turning your backyard into a biodiversity hotspot!
By implementing a rain garden, you not only support the environment but also enhance your property’s aesthetic appeal. Imagine a vibrant garden filled with native plants, buzzing with bees and fluttering butterflies. It’s a win-win!
So why not take action? Start planning your rain garden today. You’ll be contributing to water conservation while creating a stunning outdoor space. Your yard and Mother Nature will thank you for it!
FAQs
What size should my rain garden be?
The size of your rain garden depends on the area of impervious surfaces that contribute to runoff. A good rule of thumb is to make the garden about 5-15% of the total area of these surfaces. For example, if your roof area is 1,000 square feet, your rain garden should be between 50 and 150 square feet.
How do I choose the right plants for my rain garden?
Opt for native plants that thrive in both wet and dry conditions. Native species are adapted to your local climate and soil, making them resilient and beneficial for local wildlife. Look for plants with varying heights, bloom times, and textures to create a visually appealing garden.
Will my rain garden attract mosquitoes?
Mosquitoes love stagnant water, but a well-designed rain garden should drain within 24-48 hours after a rain. If you notice standing water for longer, reassess your garden’s drainage and soil composition to prevent mosquito breeding.
Do I need a permit to build a rain garden?
Regulations vary by location. Generally, you do not need a permit for a rain garden that manages uncontaminated rainwater. However, it’s wise to check with local authorities to ensure compliance with any specific guidelines.
Can I install a rain garden myself?
Absolutely! Many homeowners successfully create their rain gardens. Just follow the guidelines for site selection, size, and plant choice. However, if you’re unsure or have unique conditions, consulting a professional can provide valuable insights.
Please let us know what you think about our content by leaving a comment down below!
Thank you for reading till here 🙂
And if you’re looking to make your gardening experience even better, consider this 7 Piece Gardening Tool Set. With everything you need to dig, plant, and prune, you’ll be ready to tackle any gardening project!
Don’t forget to test your soil before planting! A Soil Testing Kit will help determine the pH level of your soil, ensuring that your plants have the best possible start!
And while you’re at it, consider a Compost Bin to recycle kitchen waste and create nutrient-rich compost for your plants. It’s a great way to reduce waste while nourishing your garden!
For those hot summer days, a stylish Galvanized Steel Watering Can will keep your plants hydrated and looking fabulous.
All images from Pexels
