
How to Choose the Right Microgreens Varieties for Home Growing
Introduction
Microgreens are tiny, vibrant plants that pack a serious punch! These nutrient-dense greens are the culinary equivalent of a superhero in your salad bowl. They’re easy to grow and can transform salads, sandwiches, and garnishes from mundane to magnificent. Picture this: a fresh salad topped with a sprinkle of radish microgreens that deliver a zesty kick or a sandwich adorned with sweet basil microgreens for that extra flavor oomph.
What’s not to love? Despite their petite size, microgreens can elevate your dishes and enhance your health. They’re rich in vitamins and minerals, making them a powerhouse of nutrition. Plus, they’re a fun way to get your hands dirty and try your green thumb at home gardening. To get started, a Microgreens Growing Kit can be your best friend!
Choosing the right varieties is crucial for your personal preferences and culinary needs. Will you prefer spicy radish or sweet pea shoots? The possibilities are endless! So, roll up your sleeves and get ready to discover which microgreens will thrive in your kitchen and on your plate.

Summary
This article covers everything you need to know about selecting the ideal microgreens for your home garden. We’ll emphasize the importance of choosing varieties that not only provide health benefits but also fit your culinary needs and growing experience. Factors like flavor profiles, growth rates, and market demand are key when making your selection.
We’ll also spark your curiosity about popular varieties such as radish and sunflower, highlight potential growing challenges, and share tips for beginners. Whether you’re a seasoned gardener or a newbie, this guide aims to help you enjoy the delightful world of microgreens! And don’t forget, a LED Grow Light is essential for those gloomy days!

Understanding Microgreens
What are Microgreens?
Microgreens are young edible plants harvested just after germination. They’re typically 1 to 3 inches tall and have fully developed cotyledon leaves. Unlike sprouts, which are harvested immediately after germination, microgreens are allowed to grow a bit longer. They boast a variety of flavors, colors, and textures, making them a vibrant addition to any dish.
You might also hear the terms “baby greens” or “sprouts” tossed around. Here’s the scoop: sprouts are germinated seeds that lack true leaves and are usually grown in water. Baby greens, on the other hand, are young plants that have been allowed to grow longer than microgreens but are harvested before they reach full maturity.

Nutritional Benefits
Microgreens are nutritional powerhouses! They contain concentrated levels of vitamins, minerals, and antioxidants. Research shows that some microgreens have up to 40 times more nutrients than their mature counterparts. For instance, broccoli microgreens are rich in sulforaphane, which may help combat some chronic diseases.
Common vitamins found in microgreens include vitamins A, C, and K, along with essential minerals like iron, magnesium, and calcium. Incorporating a variety of microgreens into your diet not only adds flavor but also boosts your overall nutritional intake. So, why not give your health a delicious lift with these tiny green wonders? And if you’re looking for the perfect soil, consider Organic Potting Soil for optimal growth.

Factors to Consider When Choosing Microgreens
Choosing the right microgreens for your home garden is a delightful and sometimes daunting task. With so many varieties available, it’s crucial to consider several factors to ensure your microgreen journey is both tasty and successful. Here’s a breakdown of the key considerations to help you select the best microgreens for your needs.

Flavor Profiles
Microgreens are not just pretty; they’re flavorful too! Their taste can range from spicy to sweet and even nutty. This variety offers a chance to experiment with flavors in your cooking.
For those who enjoy a kick in their salads, radish microgreens deliver a spicy punch. They’re perfect for tacos and sandwiches, adding zest to any dish. If you’re looking for something sweeter, sunflower microgreens are your go-to choice. Their nutty flavor makes them an excellent addition to salads and smoothies, providing a delightful crunch. To keep your microgreens fresh, consider using an Airtight Storage Container.
Here’s a quick guide to flavor profiles:
- Spicy: Radish, mustard, and arugula microgreens pack a punch.
- Sweet: Pea shoots and sunflower microgreens offer a delightful sweetness.
- Nutty: Sunflower and buckwheat microgreens bring a unique, rich flavor.
Choosing microgreens based on flavor profiles ensures your culinary creations shine. So, think about your favorite dishes and how different microgreens can elevate the taste!

Growth Rate and Conditions
The growth rate of microgreens varies, which affects your gardening timeline. Some varieties, like arugula and radish, are quick to germinate and ready for harvest in as little as a week. Others, like basil and cilantro, take a bit longer, with growth times reaching up to three weeks.
When selecting microgreens, consider the optimal growing conditions:
- Light: Microgreens thrive in bright, indirect sunlight or under grow lights. Aim for 12-16 hours of light daily to ensure robust growth.
- Temperature: Most microgreens prefer temperatures between 60°F and 75°F. Keeping the environment stable helps prevent slow growth.
- Humidity: A humidity level of around 40-70% keeps your microgreens happy. If your home is dry, consider misting the plants occasionally.
By understanding these growth rates and conditions, you can plan your planting schedule and ensure your microgreens flourish. A Grow Light Timer can help automate your light schedule!

Culinary Uses
Microgreens are versatile and can be incorporated into a variety of dishes. Think of them as the secret ingredient that can transform a meal. Toss them into salads for an extra crunch, sprinkle them on sandwiches for added flavor, or use them as a garnish to elevate your plating game.
For culinary inspirations, here are some popular varieties based on their uses:
- Basil: Perfect for Italian dishes, adding a fresh burst of flavor to pasta and pizza.
- Arugula: A peppery addition to salads that pairs beautifully with fruits and nuts.
- Cilantro: Great for salsas, tacos, and Asian cuisines, bringing a fresh and vibrant taste.
Experimenting with different microgreens in your cooking can lead to delightful discoveries. So, don’t shy away from trying new combinations and flavors! And if you need a little help with meal prep, Meal Prep Containers can be a game-changer!
In summary, considering flavor profiles, growth rates, and culinary uses will guide you in choosing the right microgreens for your home growing adventure. With a little planning and creativity, you can enjoy a bountiful harvest of these nutritious gems that will enhance your meals and health!

Best Microgreens Varieties to Start With
Top Picks for Beginners
Starting your microgreen adventure can be a fun and rewarding experience. Here are some beginner-friendly varieties that are easy to grow and delicious to eat:
- Radish Microgreens
- Flavor: Radish microgreens pack a spicy punch, adding zest to salads.
- Growth Time: They germinate quickly, typically within 5-10 days.
- Care Requirements: Radish microgreens thrive in well-draining soil with plenty of light. Keep them moist but not soggy.
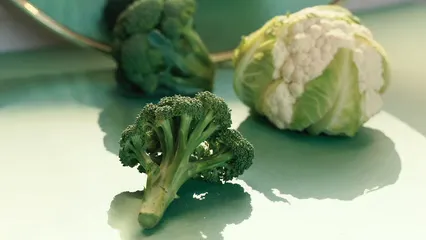
- Broccoli Microgreens
- Flavor: Mild and slightly peppery, perfect for a nutritious boost.
- Growth Time: Ready to harvest in 7-14 days.
- Care Requirements: They prefer cooler temperatures and bright, indirect sunlight. Water regularly to keep the soil moist.
- Pea Shoots
- Flavor: Sweet and crunchy, great for salads and stir-fries.
- Growth Time: Approximately 8-14 days to maturity.
- Care Requirements: Pea shoots need a bit more space to grow, so use a wider tray. Keep the soil consistently moist.
- Sunflower Microgreens
- Flavor: Nutty and sweet, they make a delightful addition to sandwiches.
- Growth Time: Generally ready in 7-14 days.
- Care Requirements: Sunflower microgreens love light and should be watered regularly to prevent drying out.
- Basil Microgreens
- Flavor: Aromatic and slightly sweet, ideal for Italian dishes.
- Growth Time: Takes about 14-20 days to grow.
- Care Requirements: Basil microgreens prefer warm environments and bright light. Ensure they’re watered adequately without waterlogging.
- Kale Microgreens
- Flavor: Mild and slightly earthy, these greens are packed with nutrients.
- Growth Time: Around 7-10 days until harvest.
- Care Requirements: Kale is forgiving. They grow well in soil that retains moisture but drains well.
- Mustard Microgreens
- Flavor: Spicy with a hint of pepper, adding a kick to your dishes.
- Growth Time: Germinates in 5-10 days.
- Care Requirements: Mustard microgreens enjoy light and should be watered regularly to maintain moisture.
- Cilantro Microgreens
- Flavor: Fresh and citrusy, perfect for salsas and garnishes.
- Growth Time: Takes about 10-20 days to reach the ideal height.
- Care Requirements: Cilantro prefers a cooler environment and indirect sunlight. Keep the soil moist but not overly wet.
- Beet Microgreens
- Flavor: Sweet and earthy, adding color and flair to any dish.
- Growth Time: Usually ready to harvest in 10-14 days.
- Care Requirements: Beet microgreens thrive in rich soil. They enjoy consistent watering but hate sitting in water.
- Arugula Microgreens
- Flavor: Peppery and bold, perfect for salads and sandwiches.
- Growth Time: Ready in about 7 days.
- Care Requirements: Arugula grows best in cool conditions with plenty of light. Keep the soil moist for optimal growth.
For more information on growing microgreens year-round, check out this guide: How to grow microgreens for year-round harvest
These varieties are not just easy to grow; they also pack a lot of flavor and nutrients. Starting with these beginner-friendly microgreens can set you on the right path to gardening success! To keep track of your gardening journey, a Gardening Journal can be incredibly helpful!

Specialty Microgreens
Once you’re comfortable with the basics, you might want to venture into specialty microgreens. These varieties can add unique flavors and aesthetic appeal to your dishes:
- Kale: Rich in nutrients, kale microgreens have a slightly peppery flavor. They’re versatile for salads and smoothies.
- Cilantro: Known for its distinct aroma and taste, cilantro microgreens are great for Thai and Mexican cuisines.
- Mustard Greens: With a spicy kick, mustard microgreens can elevate the flavor profile of your dishes. They pair well with hearty meals.
- Chard: Colorful and mild, chard microgreens can brighten up your salads and are rich in vitamins A and K.
- Melon Microgreens: These unique microgreens offer a subtle sweetness and can be used in desserts or salads for a fresh twist.
Specialty microgreens can be a bit more demanding but are worth the effort for their unique culinary applications. Whether you’re adding them to a colorful salad or using them as a garnish, these varieties can elevate your culinary creations to new heights. Happy growing! And if you’re looking for a way to keep your herbs fresh, an Herb Drying Rack might be just what you need!

Seasonal Considerations
When choosing microgreens, it’s essential to consider the seasons. The right microgreens for your growing conditions can lead to a bountiful harvest.
In spring and summer, many varieties thrive. Consider growing pea shoots and radish microgreens. They love the warmth and can reach your plate in just a week! Sunflower microgreens are also a fantastic choice during warmer months, offering a nutty crunch to salads.
As winter settles in, opt for heartier varieties like broccoli and kale microgreens. They can tolerate cooler temperatures and still pack a nutritious punch. If you want a splash of color, try beet microgreens; their vibrant hues will brighten up any dreary winter day.
For year-round cultivation, consider the use of grow lights. They provide the necessary light for healthy growth, even when the sun is hiding behind clouds. Additionally, keep your indoor environment stable with a humidity level between 40-70%. This will help ensure your microgreens flourish regardless of the season. A Hydroponic Growing System is also a great option for indoor gardening!

Tips for Successful Microgreen Growing
Soil and Growing Medium
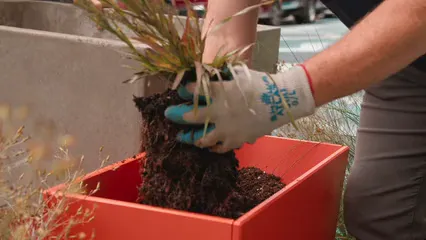
Selecting the right growing medium is crucial for microgreen success. Organic potting soil works wonders, providing both nutrients and stability. Yet, if you’re feeling adventurous, try alternatives like coconut coir or hydroponic mats. Both options offer excellent drainage and aeration, crucial for healthy root development. If you’re looking for coconut coir, check out this Coconut Coir Growing Medium.
Before planting, moisten the soil slightly. This helps seeds settle without washing them away. For those using paper towels, dampen them before scattering seeds on top. Remember, it’s essential to keep the growing medium moist but not soggy. Overwatering can lead to mold—yikes! Keep an eye on moisture levels, especially in warmer months.

Watering and Light Requirements
Watering microgreens is an art. Generally, they love moisture, but not too much! A gentle mist every day or every other day works well. Just be cautious not to drown them. If leaves start to yellow, you might be overdoing it.
Now, let’s talk light. Microgreens need 12-16 hours of bright light daily. If you’re using natural sunlight, a south-facing window is prime real estate. If that’s not an option or it’s winter, consider investing in LED grow lights. These can be positioned just a few inches above your trays, ensuring your greens grow strong and healthy. A Watering Can is also handy for keeping your greens hydrated!
Beginners often forget to adjust their light as plants grow. If your microgreens start to reach for the light, it’s a sign they’re not getting enough! Keep lights close during the early stages, then raise them as the seedlings grow. This helps prevent leggy growth and promotes sturdy plants.
With these tips, you’ll be well on your way to a thriving microgreen garden. Happy growing!

Harvesting Techniques
Harvesting microgreens is both an art and a science. Timing is key! The best time to harvest is when the plants reach about 1 to 3 inches tall. This is usually between 7 to 21 days after sowing, depending on the variety. For example, radish microgreens are ready in just a week, while basil may take up to two weeks.
To maximize flavor and nutrition, use a sharp pair of scissors or a knife. Cut just above the soil line to avoid damaging the roots. This method not only preserves the delicate greens but also keeps your plants healthy for potential regrowth. However, microgreens typically don’t regrow after harvesting, so plan accordingly! A good pair of Scissors for Harvesting can make this process much easier!
After harvesting, it’s essential to store your microgreens properly. They’re best kept in an airtight container lined with a paper towel to absorb moisture. Place them in the fridge, where they can stay fresh for 3 to 5 days. Avoid washing them until you’re ready to use them; excess moisture can lead to spoilage.
For those with a keen eye on quality, remember: fresh microgreens should feel crisp and vibrant, not wilted or slimy. This way, you’ll always have a delightful burst of flavor and nutrition ready for your salads, sandwiches, or gourmet garnishes!

Conclusion
Choosing the right microgreens is a journey, not a race. Start with varieties that resonate with your taste buds, like the peppery radish or the sweet pea shoot. Remember, each microgreen has its unique flavor, nutritional profile, and growing requirements. Experimenting with different types can lead to delightful culinary discoveries and even elevate your gardening skills.
Don’t be afraid to mix and match! Consider your growing conditions—like available light and space—while also factoring in your personal preferences. You might find that you enjoy the zesty kick of arugula or the subtle sweetness of sunflower microgreens. For those who love to cook, a Recipe Book for Microgreens can inspire your culinary creations!
As you embark on this green adventure, keep an open mind. Each planting is a chance to learn, adapt, and savor the fruits of your labor. So grab your seeds, gather your supplies, and get ready to witness the magic of microgreens unfold right in your kitchen. Happy growing!

FAQs
What are the easiest microgreens to grow for beginners?
Some of the simplest microgreens for novices include radish and broccoli. Both germinate quickly and are forgiving in the growing process.
Can I grow microgreens without soil?
Absolutely! Hydroponic systems or even growing on paper towels are viable options. Just ensure the roots have proper support and moisture.
How long do microgreens take to grow?
Most microgreens can be harvested within 1 to 3 weeks. For instance, radish takes about 7 days, whereas basil may take up to 20 days.
What is the best way to store harvested microgreens?
For freshness, store microgreens in an airtight container lined with dry paper towels. They can last for 3 to 5 days in the refrigerator.
Can I mix different microgreens varieties in one tray?
You can, but it’s essential to consider growth rates and compatibility. Choose varieties with similar germination times for the best results.
Are all seeds suitable for growing microgreens?
Not all seeds are created equal! Always use seeds specifically labeled for microgreens to ensure safety and optimal growth.
Please let us know what you think about our content by leaving a comment down below!
Thank you for reading till here 🙂
All images from Pexels


