![]()
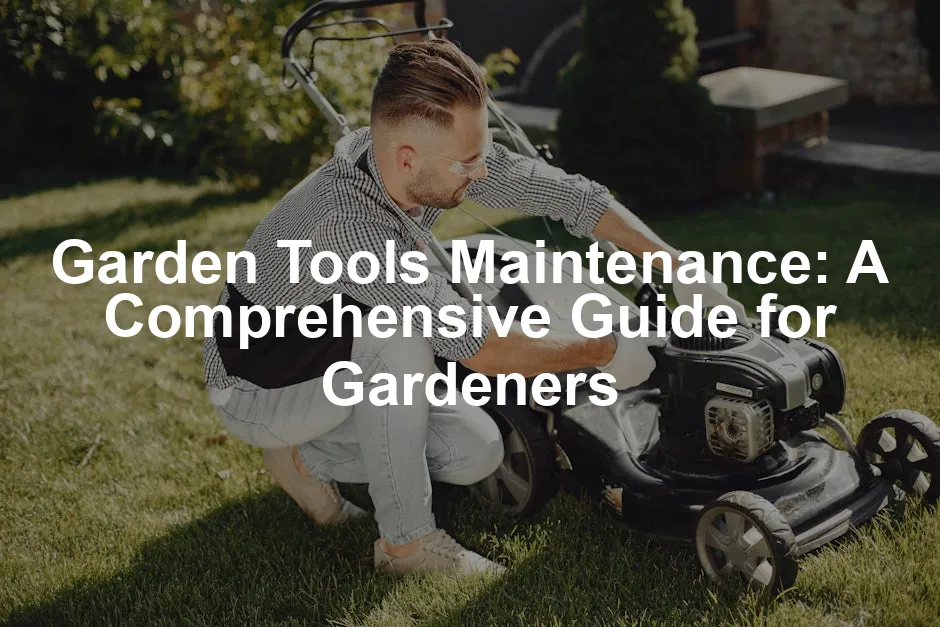
Garden Tools Maintenance: A Comprehensive Guide for Gardeners
Introduction
Maintaining your garden tools is essential for every gardener. Proper care not only extends the life of your tools but also boosts your gardening efficiency. Clean, sharp tools make tasks easier and enhance your overall gardening experience. Plus, well-maintained tools play a vital role in keeping your plants healthy.
Summary and Overview
Garden tools maintenance involves several key components. Regular cleaning, sharpening, and proper storage are crucial for optimal performance. The benefits of maintaining your tools include improved efficiency, enhanced safety, and cost-effectiveness. In this article, we will cover essential topics like cleaning techniques, sharpening methods, and the best storage practices for your garden tools.
Importance of Regular Maintenance
Regular maintenance of garden tools matters for several reasons. First, it significantly enhances gardening efficiency. Sharp tools cut through soil and plants more easily, reducing the time and effort needed for tasks. Dull or damaged tools can lead to accidents, posing safety concerns. Imagine trying to prune with a dull pair of shears—frustrating, right?
Moreover, maintaining your tools helps prevent the spread of plant diseases. Dirty tools can transfer pathogens from one plant to another, jeopardizing your entire garden. A clean set of tools minimizes this risk. Lastly, proper maintenance ensures the longevity of your tools. Investing time and effort in care will save you money in the long run.
Speaking of saving money, investing in a Garden Tool Set can make all the difference. A comprehensive set ensures you have everything you need to tackle any gardening task with ease. Plus, who doesn’t love shiny new tools?
To learn more about how to make your tools last longer, check out this guide on garden tool longevity.
So, how often do you check your tools? Reflect on your current maintenance habits and consider implementing a regular routine. Your garden will thank you!
Daily Maintenance Practices
Cleaning After Each Use
Keeping your garden tools clean is vital. After each use, it’s essential to rinse off any soil and debris. This simple act prevents the spread of diseases and keeps your tools in good shape. Did you know that dirty tools can transfer pathogens from one plant to another?
To clean your tools effectively, use a garden hose and a stiff brush for stubborn mud. A putty knife can help remove caked dirt. After rinsing, drying your tools is crucial. Leaving them wet can lead to rust and accelerate wear.
Make a habit of setting up a cleaning station. A designated area with a hose, brushes, and a towel will make the process easier. You’ll find it convenient and quick, ensuring your tools are always ready for the next gardening session.

Conditioning Wooden Handles
Wooden tool handles require special attention to maintain their integrity. Over time, moisture can cause them to crack or splinter. To prevent this, regularly sand the handles lightly to remove rough spots.
Applying boiled linseed oil helps protect and nourish the wood. It creates a barrier against moisture and keeps the handles smooth. Remember, regular checks are essential. Inspect your wooden handles for signs of wear or damage. A little preventive care can go a long way in extending the life of your tools.
By following these daily maintenance practices, you can ensure your garden tools remain effective, safe, and ready to assist you in your gardening adventures.
To make your gardening efforts even more comfortable, consider investing in a pair of gardening gloves. They protect your hands from dirt and potential injuries while adding a touch of style to your gardening ensemble!
Seasonal Maintenance Tips
Spring Cleaning for Tools
As spring approaches, it’s time to rejuvenate your garden tools. A good spring cleaning routine sets the tone for a productive gardening season. Start by giving your tools a deep clean. Rinse off any dirt and debris using a garden hose. A stiff brush can help remove stubborn clumps of soil.
Next, inspect each tool closely. Look for any signs of wear or damage. Are there any loose screws or cracked handles? Address these issues before you start gardening.
Once cleaned, it’s crucial to sharpen your blades and edges. Sharp tools make cleaner cuts, reducing stress on your plants. Use a sharpening stone or mill file to restore the edges. Regular sharpening improves efficiency and helps prevent injuries caused by dull blades.

For tips on seasonal maintenance, you can refer to this article on seasonal maintenance tips for self-watering container gardens in fall 2024.
Finally, create a spring maintenance checklist. This simple step can ensure you don’t overlook any essential tasks. What will you include? Cleaning, sharpening, and repairs are great places to start!
End-of-Season Care
As the gardening season winds down, it’s essential to prepare your tools for winter. Begin your end-of-season routine by cleaning all tools thoroughly. Remove soil and plant residues to prevent rust and corrosion during storage.
After cleaning, sharpen your tools for one last time. A sharp edge will make springtime gardening easier. Properly store your tools afterward. Hang them up or keep them in a dry, well-ventilated space to avoid moisture buildup.
If you use power tools, special care is necessary. Check the manufacturer’s guidelines for winter preparation. Draining fuel or cleaning parts can prevent future issues.
Consider scheduling a specific date for your end-of-season care. Mark it on your calendar to ensure you don’t forget! This routine will save you time and frustration when spring arrives.

Sharpening Techniques
Importance of Sharp Tools
Sharp tools are essential for any gardener. They not only make your tasks easier but also promote healthier plants. When tools are sharp, they make cleaner cuts, reducing damage to plants. This minimizes stress and helps them heal faster. Imagine trying to prune a delicate flower with dull shears—it’s frustrating and can cause more harm than good.
Different tools require various sharpeners. For pruners and shears, a sharpening stone or a specialized sharpener works well. Shovels and hoes can benefit from a mill file. Each tool has its specific needs, so it’s crucial to choose the right sharpener. Regular sharpening sessions will keep your gardening tools efficient and effective. So why not schedule some time to sharpen your tools? Your plants will appreciate it!

Step-by-Step Sharpening Guide
Sharpening your garden tools doesn’t have to be complicated. Here’s a simple guide to get you started.
Pruners and Shears: Start by cleaning the blades with a cloth. Next, use a sharpening stone or a file. Hold the tool steady and slide the sharpener along the blade at the existing bevel angle. Repeat this motion several times until the edge feels sharp.
Shovels and Hoes: For these tools, use a mill file. Secure the tool, and file the edges in a consistent motion. Focus on maintaining the original angle. This technique will restore the blade’s sharpness effectively.
Using a Grinder: For heavily used tools like axes, an electric bench grinder can be helpful. Be cautious not to overheat the steel as this can weaken the blade. After grinding, ensure the edges are smooth and balanced.
With practice, sharpening tools will become a breeze. Maintaining sharp edges will enhance your gardening efficiency. So grab your tools and start sharpening!
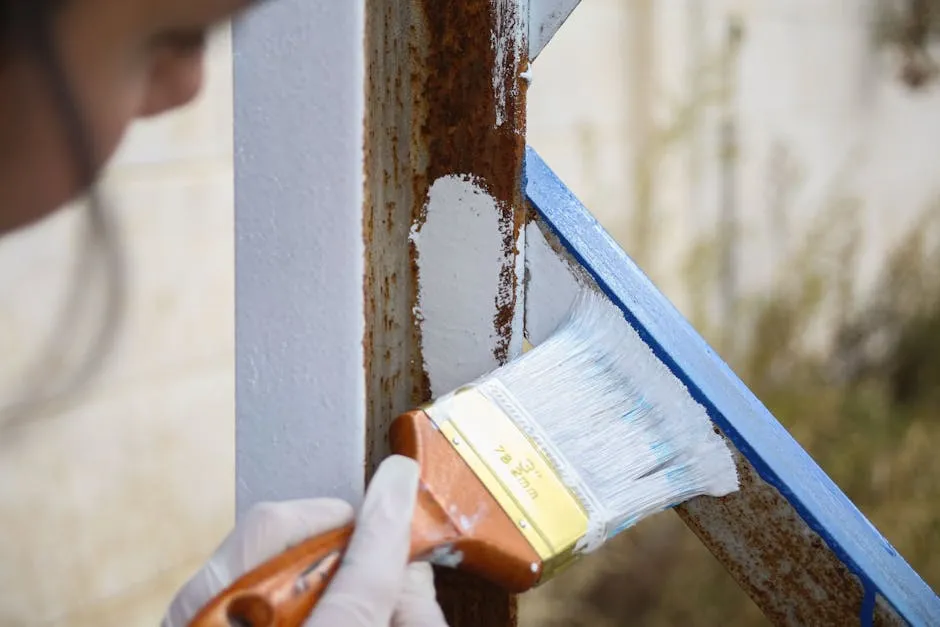
Rust Prevention and Removal
Preventing Rust on Tools
Rust can quickly ruin your beloved garden tools. Luckily, there are effective ways to keep rust at bay. One simple method is to oil metal parts after cleaning. This creates a protective barrier against moisture. Use a good quality oil, like boiled linseed oil, for best results.
Another technique involves a sand and oil mixture. Fill a bucket with clean sand and pour in some oil. When you’re done using your tools, plunge them into this mixture. It cleans and protects your metal tools simultaneously. This method is a favorite among gardeners for its dual benefits.
Make regular checks for rust a part of your tool maintenance routine. A quick visual inspection can prevent bigger problems later. By staying proactive, you’ll enjoy longer-lasting tools and a smoother gardening experience.
Removing Rust
If rust does appear, don’t worry; it can be removed effectively. One popular method is to use vinegar. Soak the rusted parts in a mixture of vinegar and water overnight. After soaking, scrub the rust away with a wire brush or sandpaper. This method is gentle yet effective.
For stubborn rust, sandpaper can be your best friend. Use 80-grit sandpaper for light rust and a wire brush for heavier rust. Always remember to dry your tools thoroughly after cleaning. This step is crucial to prevent new rust from forming.
Once the rust is gone, re-oil the tools. This step is vital for protecting them from future rust. A well-maintained rust removal kit can be a game changer. Consider putting together your own kit with vinegar, sandpaper, and oil. Regular care will keep your tools in top shape for years to come.
For more tips on keeping your tools rust-free, check this article on garden tool rust prevention.
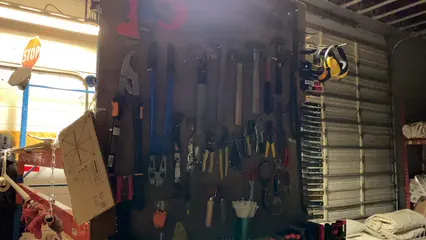
Proper Storage Practices
Importance of Proper Storage
Proper storage practices are critical for maintaining your garden tools. Keeping your tools dry and organized can significantly extend their lifespan. When tools are stored in damp places, they are more susceptible to rust.
Utilizing racks, hooks, and storage boxes can help keep everything organized. Hang larger tools up to prevent warping and damage. Smaller hand tools can be stored in a dedicated toolbox or bucket. This not only keeps them dry but also makes them easy to find when needed.
Creating a dedicated storage space can be a game changer for your gardening routine. Designate a spot in your garage or shed specifically for your tools. This will ensure they are always in good condition and ready for use. Remember, a little effort in storage goes a long way in maintaining your tools.
Please let us know what you think about our content by leaving a comment down below!
Thank you for reading till here 🙂
And while you’re at it, why not add a little flair to your garden with some outdoor garden lights? They add a magical touch to your space and let you enjoy your garden even after the sun goes down!
All images from Pexels


