![]()

Flower Crown Flowers: Crafting Your Floral Masterpiece
Introduction
Have you ever wanted to wear a flower crown? These beautiful creations hold significance in many cultures. From ancient traditions to modern festivals, flower crowns symbolize beauty and celebration. They add a whimsical touch to weddings, music festivals, and personal milestones.
Making a flower crown is a joyful experience. It allows your creativity to shine as you choose flowers and design your unique accessory. Let’s discover how to craft your floral masterpiece together!
Summary and Overview
In this article, we’ll focus on selecting the right flowers for your crown. Choosing the perfect blooms is essential for a stunning design. We’ll dive into the DIY aspect, encouraging you to create a flower crown that reflects your style.
Flower crowns are versatile; they suit various occasions and styles. We aim to equip you with the knowledge to create your own masterpiece, offering tips on materials and techniques. Let’s get started!
Choosing the Right Flowers for Your Flower Crown
Types of Flowers
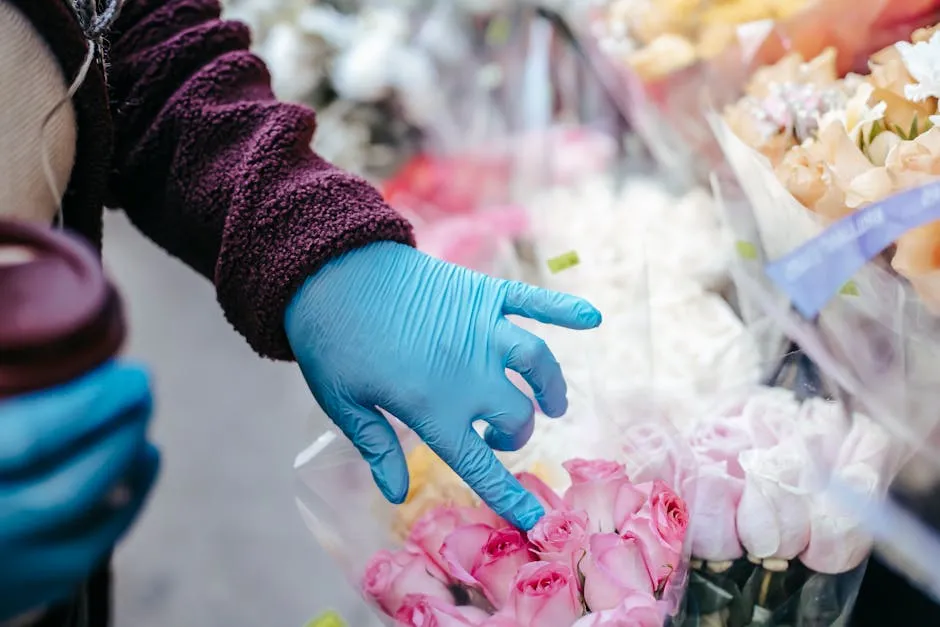
When crafting a flower crown, flower selection is crucial. Start with focal flowers, which draw the eye. Roses, peonies, and orchids are popular choices that add elegance. For more information on growing roses, check out these Tips for growing award-winning roses organically.
Roses are a popular choice for flower crowns due to their beauty and availability. Learn more about growing roses.
Next, consider filler flowers. Baby’s breath and wax flowers fill gaps and create texture. These smaller blooms enhance the overall look without overwhelming it. Baby’s Breath Flowers are not just beautiful; they can also be used to fill in those pesky gaps that all flower crowns seem to have. Plus, they’re super affordable!
Don’t forget greenery! Eucalyptus and ivy add a lush backdrop to your crown. They provide contrast and depth, making your design more dynamic. For more on caring for eucalyptus, check out The Ultimate Guide to Eucalyptus Plants: Care, Benefits, and More.
Eucalyptus is a great addition to flower crowns for its lush look and aroma. Discover more about eucalyptus care.
Statistics show that roses and peonies are among the most favored flowers for crowns, loved for their beauty and availability. For a comprehensive guide to peonies, check out The Allure of Peonies: A Comprehensive Guide to Nature’s Opulent Blooms.
Peonies are another beautiful option for your flower crown. Learn more about peonies.
Check out your local florist for fresh options. You’ll find a rainbow of colors and textures to inspire your creativity. Happy crafting!
Essential Tools and Materials
What You’ll Need
Creating a stunning DIY flower crown requires just a few essential tools and materials. Start with floral wire, which acts as the crown’s base. Floral tape is also crucial for securing your flowers in place. You’ll need sharp scissors for trimming stems and a selection of ribbons to add that finishing touch.
When it comes to flowers, opt for a mix of focal blooms and fillers. Popular choices include roses, peonies, and daisies. For fillers, consider using baby’s breath or wax flowers. Greenery like eucalyptus or ivy will enhance your crown’s overall look.
On average, the cost of these materials can range from $20 to $50. Check online stores or local craft shops for supplies to kickstart your floral crafting adventure!
Step-by-Step Guide to Making a Flower Crown
Step 1: Preparing the Base
Before you start adding flowers, it’s essential to create the crown’s base. Begin by measuring the circumference of your head. Use a piece of floral wire and wrap it around your head, forming a semicircle. Ensure it sits comfortably above your ears.
Once you have the right length, twist the wire ends together, forming a secure loop. For added stability, consider doubling up the wire. This technique will help support heavier blooms. Create small loops at the ends for tying your ribbon later.
Now your crown base is ready! This step sets the foundation for the beautiful flowers you’ll attach next.
Step 2: Preparing the Flowers
With the base ready, it’s time to prepare your flowers. Start by trimming the stems to about 3-5 inches. This length provides enough support for attaching them securely to the crown.
Be mindful of flower preservation. If you plan to wear the crown for an extended period, consider misting the flowers lightly with water. This helps maintain their freshness. Using a plant mister is a fantastic way to keep your blooms looking vibrant and fresh!
For roses, remove any discolored guard petals for a cleaner look. Gather your flowers into small posies, combining a focal flower, a filler, and a piece of greenery. Bind these together with floral tape to create attractive clusters.
Now, your flowers are prepared and ready for the next exciting step!
Step 3: Assembling the Crown
Now that your flowers are prepped, it’s time to attach them to your crown. Begin by taking a floral posy—this should consist of a focal flower, a filler flower, and some greenery. Use floral tape to secure the stems together tightly. This will help ensure each cluster stays intact as you work.
Next, attach the posy to your wire base. Start at one end of the wire and wrap the floral tape around the stems and the wire. Make sure to overlap the tape as you go, providing a sturdy hold. For a natural look, angle each flower slightly upwards or downwards as you attach them. This technique helps create a visually appealing arrangement.
As you continue, take a moment to step back and check your progress. Are there any gaps? Adjust the placements if necessary, adding more flowers or repositioning existing ones. Consider color and texture; mixing different blooms can enhance the overall look.
Don’t hesitate to experiment! Play with the arrangement until it feels right. Remember, this is your creation, and it should reflect your style. Enjoy this part of the process—there’s no wrong way to design your flower crown!

Step 4: Final Touches
With your flowers securely attached, it’s time for the finishing touches. First, ensure the crown fits comfortably on your head. You can do this by tying a ribbon through the loops at the ends of the wire. Make sure the ribbon is long enough for a bow that holds the crown in place without digging into your skin.
Check your flower crown for any gaps or uneven areas. If you notice any, simply fill them in with additional greenery or smaller flowers. This will create a fuller appearance and make your crown look more polished.
Finally, give everything a final trim. Snip any stems that stick out or appear too long, ensuring a neat finish. Your flower crown is now complete! Step back and admire your handiwork, and get ready to wear it with pride.
Feel free to share your unique designs with friends or on social media. You never know who you might inspire to create their own floral masterpiece!
Caring for Your Flower Crown
Keeping It Fresh
To maintain the freshness of your flower crown, consider the following tips. First, lightly mist your flowers with water before wearing them. This simple act can help keep them hydrated throughout the day.
If you’re not wearing the crown immediately, store it in a cool, dark place. Avoid direct sunlight, as it can cause flowers to wilt faster.
Using a plant mister can also be beneficial. A few spritzes will keep your blooms looking vibrant. Remember, fresh flowers can be delicate, so treat your crown gently. Enjoy wearing your beautiful creation!

Flower Crown Trends and Inspirations
Current Styles and Occasions
Flower crowns are more popular than ever! Today’s trends showcase vibrant colors and diverse styles. Seasonal flower crowns, for instance, feature blooms that reflect nature’s palette. In spring, think pastel hues with tulips and daisies. Summer calls for bold colors using sunflowers and zinnias. Fall brings earthy tones with dahlias and chrysanthemums, while winter might showcase evergreen sprigs mixed with delicate white flowers.
These crowns are perfect for various occasions. Weddings often feature floral arrangements that match the bride’s theme. Festivals celebrate creativity with wildflower crowns, allowing for fun and experimentation. Birthdays and baby showers also embrace this trend, adding a whimsical touch to celebrations.

If you’ve created your own flower crown, share your masterpiece on social media! Your creativity can inspire others to join in the fun of crafting beautiful floral accessories.
Conclusion
Making flower crowns is a joyful and creative process. It allows you to express your style and embrace nature’s beauty. With the right flowers and tools, anyone can create a stunning crown. Don’t hesitate to try crafting your own! Share your experiences and designs with friends or online. Your floral creation could spark inspiration for others. Enjoy the process, and let your creativity bloom!
FAQs
What flowers are best for making a flower crown?
Choosing the right flowers is key for a beautiful crown. Focal flowers like roses, peonies, and orchids catch the eye. These blooms offer vibrant colors and lovely scents. For fillers, consider baby’s breath or wax flowers. They add texture and soft charm without overwhelming the design. Greenery, such as eucalyptus or ivy, provides a lush backdrop. These elements together create a stunning floral piece that stands out.
Can I make a flower crown with artificial flowers?
Absolutely! Artificial flowers are a fantastic option for flower crowns. They come in various colors and styles, allowing for endless creativity. The biggest benefit is their longevity; you can wear them repeatedly without worrying about wilting. Also, they’re often more affordable than fresh flowers. Plus, you can customize your crown any time, matching it to any outfit or occasion.
How long will my flower crown last?
Fresh flower crowns typically last around 24 hours. However, with proper care, such as misting with water, they can stay vibrant longer. Dried flower crowns, on the other hand, can last for months or even years. They maintain their beauty without needing much upkeep. So, if you want a long-lasting crown, consider using dried flowers for your design.
Are there specific flowers to avoid?
Yes, some flowers wilt quickly and are best avoided. For instance, many delicate blooms like daisies or hydrangeas can droop after a short time. Additionally, some flowers may trigger allergies in sensitive individuals. Common allergens include lilies and certain pollinating flowers. It’s wise to choose flowers that won’t cause discomfort for you or your guests.
What occasions are flower crowns suitable for?
Flower crowns are wonderfully versatile! They’re perfect for weddings, whether for the bride or bridesmaids. Festivals and parties also embrace floral headpieces, adding a whimsical touch. Birthdays, photoshoots, and special celebrations can all benefit from a flower crown. They bring a sense of joy and festivity to any event, making you feel special and unique.
How do I store my flower crown if I’m not wearing it?
If you need to store your flower crown, keep it in a cool, dark place. Avoid direct sunlight, as it can accelerate wilting. For fresh crowns, mist them lightly with water before storing. If you made a dried crown, you can keep it in a box or on a shelf to protect it from dust. Proper storage helps maintain its beauty for your next wear.
Can I customize my flower crown colors?
Definitely! Customizing your flower crown is part of the fun. Choose colors that reflect your personality or match your outfit. You can mix and match blooms to create a unique design. Seasonal colors can also inspire your choices. Whether you prefer soft pastels or bold hues, your crown can be as creative and personal as you wish!
Please let us know what you think about our content by leaving a comment down below!
Thank you for reading till here 🙂
All images from Pexels


