![]()

Building a DIY Drip Irrigation System: A Comprehensive Guide for Garden Enthusiasts
Introduction
In a world where every drop counts, why waste water on inefficient watering methods? Building your own DIY drip irrigation system can save you both time and money while keeping your garden lush and thriving. Imagine a system that delivers water directly to the roots of your plants, ensuring they get just the right amount without the hassle of manual watering. It’s like having a personal gardener who only shows up when the plants need a drink—no awkward chats or small talk involved!
Creating a DIY drip irrigation system is not just a smart choice; it’s an eco-friendly solution that helps conserve water. Traditional watering methods often lead to evaporation and runoff, wasting precious resources. With drip irrigation, every drop is utilized efficiently. Water is delivered slowly and directly to the plant roots, reducing evaporation and minimizing weed growth. This means healthier plants and a happier environment!
You may wonder, “Is this going to be complicated?” Not at all! Setting up a drip irrigation system can be a straightforward weekend project. With a few essential components, some basic tools, and a sprinkle of enthusiasm, you’ll have your system up and running before you can say “green thumb.” Plus, you’ll want to grab a Rain Bird Drip Irrigation Kit to make it even easier!
In this guide, we’ll walk you through everything you need to know about creating your own drip irrigation system—from the essential components to installation tips and maintenance advice. You’ll discover how to assess your garden’s watering needs, choose the right materials, and ensure your plants thrive all season long. So grab your tools and let’s jump into the wonderful world of DIY gardening solutions! Your plants will thank you.

Summary of Key Points
Are you tired of watching your plants wilt under the summer sun? A DIY drip irrigation system might just be the solution you’ve been searching for! This article covers the benefits of drip irrigation, including water efficiency, cost-effectiveness, and flexibility.
We’ll outline the essential components you’ll need, from filters to emitters, and guide you through the step-by-step installation process. You’ll learn how to assess your watering needs, determine the layout of your garden, and create a diagram of your irrigation system.
Additionally, we’ll provide tips for maintaining it for optimal performance. By the end of this article, you’ll have all the knowledge you need to set up a drip irrigation system that not only conserves water but also promotes healthy plant growth!
So, whether you’re a seasoned gardener or just starting out, this guide will empower you to take control of your watering system. Say goodbye to the days of lugging heavy watering cans and hello to the joy of efficient gardening! Happy planting!
Understanding Drip Irrigation
What is Drip Irrigation?
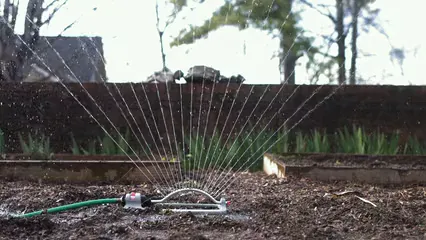
Drip irrigation is a smart watering method. It delivers water directly to the roots of plants. Think of it as a nutrient-rich IV drip for your garden! This method uses a network of tubing and emitters. Water flows slowly, reducing evaporation and runoff. The result? Plants stay hydrated without drowning.
Traditional irrigation methods, like sprinklers, can be wasteful. They spray water everywhere, including sidewalks and driveways. This leads to high water bills and thirsty plants. In contrast, drip irrigation targets only the soil around the roots. It’s like giving your plants a drink while ensuring the rest of the garden stays dry. With this efficient setup, your plants will thrive while conserving precious resources.

Benefits of Drip Irrigation
Drip irrigation offers numerous advantages that can transform your gardening experience. First up, water efficiency. By delivering water directly to the roots, it minimizes waste. You’ll notice a significant reduction in your water bills—your wallet will thank you!
Next, let’s talk about weed growth. Traditional watering encourages weeds to flourish, while drip irrigation keeps moisture strictly where it’s needed. Less competition means healthier plants. Plus, this method helps to reduce fungal diseases. A well-hydrated plant is less susceptible to issues like root rot or blight.
Cost savings don’t stop at water bills. Drip irrigation systems can be relatively inexpensive to install and maintain. They’re flexible too! You can easily adjust them as your garden grows or changes. Whether you’re adding new plants or reshaping your layout, a drip system adapts with ease.
In summary, drip irrigation is a sustainable choice for any gardener. It conserves water, reduces weeds and diseases, saves money, and offers flexibility. Who knew keeping your plants happy could be so easy and economical?
Components of a Drip Irrigation System
Essential Parts
Building a drip irrigation system requires a few essential components. Let’s break it down!
Main Components:
- Filter: This prevents debris from clogging your system. Think of it as a bouncer for your garden party—no unwanted guests allowed! You can find a reliable DIG Drip Irrigation Filter to keep your system running smoothly.
- Pressure Regulator: It ensures water pressure stays at safe levels. Too much pressure can damage the system and your plants. A Drip Irrigation Pressure Regulator is a great investment!
- Emitters: These are the tiny nozzles that release water. They come in various flow rates, so choose according to your plants’ needs. Check out Netafim Drip Emitters for quality options.
- Tubing (1/2 or 5/8-inch): This is the backbone of your system, carrying water from the source to your plants. Flexible and durable, it’s essential for proper setup.
Optional Components:
- Timers: Automate your watering schedule. Set it and forget it! An Adjustable Watering Timer can make your life so much easier!
- Fertilizer Injectors: Feed your plants as they drink. Talk about multitasking! A Fertilizer Injector for Drip Irrigation can help you achieve lush growth!
- Connectors: T-connectors and elbows help you navigate your garden layout easily.

Recommended Materials
Now that you know the components, let’s talk about where to find them and how much they’ll cost. Most hardware stores carry these materials. Expect to spend between $20 to $50 for parts to cover about 250 square feet.
For tubing, consider brands like Rain Bird or Gardena, known for their quality. Filters and pressure regulators are usually sold together, making your shopping easier. For emitters, you might try Netafim or DIG, both reliable choices. Don’t forget to check online marketplaces like Amazon or specialty garden stores for competitive pricing and availability.
Investing in the right materials will pay off. A well-constructed drip irrigation system means happy plants and less time worrying about watering. So gather your supplies and get ready to build a garden that thrives!
Planning Your Drip Irrigation System
Assessing Watering Needs
To create a successful drip irrigation system, you must assess your garden’s watering needs. Start by understanding your plants’ water requirements, which can vary significantly. For instance, tomatoes love hydration, while succulents prefer a drier approach. A simple rule of thumb is to check the soil moisture regularly; if it’s dry an inch beneath the surface, it’s time for a drink!
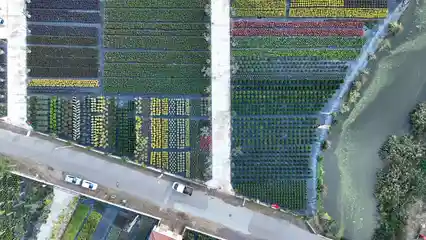
Next, determine the layout of your garden. Is it a sprawling vegetable patch or a compact flower bed? Sketch a rough diagram of your garden to visualize where the drip lines will run. Include details like plant spacing and rows, which will help you decide how many emitters you need. Remember, a well-planned layout will save you headaches down the road!
Also, take note of any obstacles. Trees, walkways, or fences can complicate your irrigation plan. Once you have your layout figured out, create a detailed diagram of your irrigation system. This will serve as your roadmap during installation and help you stay organized. A little planning goes a long way in ensuring your plants get the right amount of water.
Calculating Water Pressure and Flow Rate
Understanding your water pressure and flow rate is crucial for a functioning drip irrigation system. Start by measuring your water pressure. You can do this with a simple Garden Hose Pressure Gauge available at most hardware stores. Just attach it to your garden hose and turn on the water. If the pressure is too high, it can damage your drip system, so consider using a pressure regulator to keep things in check.
Next, adjust your system based on different soil types. Clay soil retains moisture, while sandy soil drains quickly. For clay, use emitters with lower flow rates to prevent overwatering. In sandy soil, opt for higher flow rates to ensure your plants receive adequate hydration. Adjusting your emitters will help you tailor the system to your garden’s specific needs, leading to happier, healthier plants.

Step-by-Step Installation Guide
Preparing the Site
Before diving into installation, gather your tools. You’ll need a Hose Cutter for Garden Tubing, drill with a hole punch, stakes, and a measuring tape. Having everything on hand saves time and frustration.
Next, clear the area where you’ll install the tubing. Remove any weeds, rocks, or debris that might obstruct your tubing. A clean site is a happy site! If your garden has existing plants, take care not to disturb their roots while preparing the area.
Once cleared, lay out your main tubing line. This is where the magic begins. Make sure the tubing is straight and secure it with stakes every few feet. This will ensure your system stays in place, even during a heavy watering session.

Connecting the Components
1. Setting Up the Main Line: Start by connecting the filter and pressure regulator to your water source. The filter keeps debris out of your system, while the regulator ensures your plants receive water at a safe pressure. Think of this step as setting the stage for a successful garden performance!
2. Installing the Tubing: Lay down your main tubing along the designated paths. Secure the tubing with stakes every few feet to keep it in place. If you’re working on uneven terrain, feel free to use elbow connectors to navigate around corners. T-connectors can also be useful for branching off to different areas of your garden.
3. Adding Emitters: Now for the fun part! Using the hole punch, create holes in the tubing where you want to add emitters. Space them based on the plants’ needs—closer for high-water plants and further apart for low-water varieties. Insert the emitters and make sure they fit snugly.
4. Testing the System: Before celebrating your installation victory, it’s essential to test the system. Turn on the water and check for leaks. Ensure each emitter is functioning correctly and delivering water as intended. If you spot any leaks, simply tighten the connections or adjust the emitters. A little troubleshooting now can save you a lot of trouble later.
With these steps completed, you’re well on your way to creating a thriving garden oasis! Happy gardening!

Maintenance Tips for Your Drip Irrigation System
Regular Maintenance
Maintaining your drip irrigation system is crucial for its longevity and efficiency. One of the most effective ways to keep your system running smoothly is to flush it regularly. Flushing involves running water through the system to remove dirt, algae, and other debris that can clog the emitters. Simply disconnect the main line from the water source, turn on the water, and let it flow through the system for a few minutes. This will help clear any blockages and ensure an even water distribution.
Seasonal checks are equally important for keeping your system in tip-top shape. As winter approaches, it’s essential to winterize your irrigation setup. Drain all water from the lines to prevent freezing and cracking. If you live in a region with particularly harsh winters, consider removing the main components and storing them indoors. A little prep work during the colder months will save you headaches come spring!
Troubleshooting Common Issues
Even the best systems can face hiccups, but fear not! Identifying and fixing leaks and pressure problems is easier than you might think. Start by examining your tubing and connections for any visible leaks. If you spot a dripping or pooling area, simply tighten the connections or replace damaged components. Low pressure? Check for clogs in the emitters. Replacing or cleaning them should restore the flow.
Adjusting emitters based on plant growth is another key maintenance task. As your plants mature, their water needs will change. For example, young seedlings require less water than established plants. Monitor their health and adjust your emitters accordingly. Moving emitters closer together for thirsty crops or further apart for drought-tolerant plants will help maintain optimal hydration levels. Your plants will appreciate the attention!

Conclusion
Building a DIY drip irrigation system is not just a practical solution for your garden, but it’s also an environmentally friendly choice that promotes healthy plant growth. With the knowledge and steps outlined in this guide, you can easily set up a system that works for your specific garden needs.
Regular maintenance will ensure your system operates efficiently, providing your plants with the perfect amount of water. Troubleshooting common issues like leaks and adjusting emitters based on growth will keep your garden thriving. So why wait? Start conserving water and nurturing your plants today! With a little effort and care, your garden will flourish, making every drop count.
FAQs
What types of plants benefit most from drip irrigation?
Drip irrigation is a match made in gardening heaven! Vegetable gardens thrive under this system, as it delivers consistent moisture directly to their roots. Tomatoes, peppers, and cucumbers love it! Flower beds also shine with drip irrigation, providing a steady supply of water to delicate blooms. Plus, it helps reduce fungal diseases by keeping foliage dry. Fruit trees, such as apple and peach, appreciate targeted watering too. This ensures deep root growth and juicy fruits. So, whether you’re growing veggies, flowers, or fruits, drip irrigation has your back!
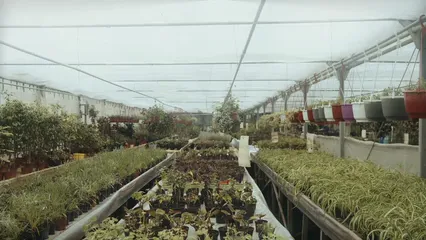
Can I use a drip irrigation system for container plants?
Absolutely! Drip irrigation is incredibly adaptable, even for container plants. Those lovely pots on your balcony can benefit from this efficient watering method. With a few adjustments, you can set up a mini drip system to deliver water to each container. Just use smaller tubing and emitters suited for pots. This way, your plants receive the right amount of moisture without the risk of overwatering. It’s a game-changer for busy gardeners. Your plants will stay hydrated, and you’ll have more time to sip lemonade while enjoying your blooming oasis!
How often should I run my drip irrigation system?
The frequency of running your drip system depends on your plants and weather conditions. Generally, it’s best to water deeply and infrequently. For most garden plants, once or twice a week should suffice. During scorching summer days, you might need to increase watering frequency. Monitor your plants and check soil moisture—if it feels dry an inch down, it’s time to water! Remember, overwatering can be just as harmful as underwatering, so strike that perfect balance for thriving plants!
What if I have a sloped garden?
Fear not, slope enthusiasts! Managing water flow in a sloped garden is totally doable with drip irrigation. One strategy is to place your emitters at different heights to ensure even water distribution. Consider using pressure-compensating emitters that deliver consistent water regardless of elevation. You might also want to create small berms or trenches to slow down water flow, allowing it to soak in rather than run off. With a little creativity, your sloped garden will flourish, and your plants will be dancing in the rain—well, almost!
Please let us know what you think about our content by leaving a comment down below!
Thank you for reading till here 🙂
If you’re interested in creating your own system, check out our guide on building a DIY drip irrigation system.
All images from Pexels


