![]()

When to Plant Ranunculus in Zone 6: A Comprehensive Guide
Introduction
Ranunculus are beloved spring flowers that bring vibrant colors to gardens. Their stunning blooms, often resembling roses, make them a favorite among gardeners and florists alike. Timing is crucial for planting ranunculus to ensure optimal growth and beautiful blossoms. In this guide, we’ll focus on the best practices for planting ranunculus in USDA Zone 6.
Summary and Overview
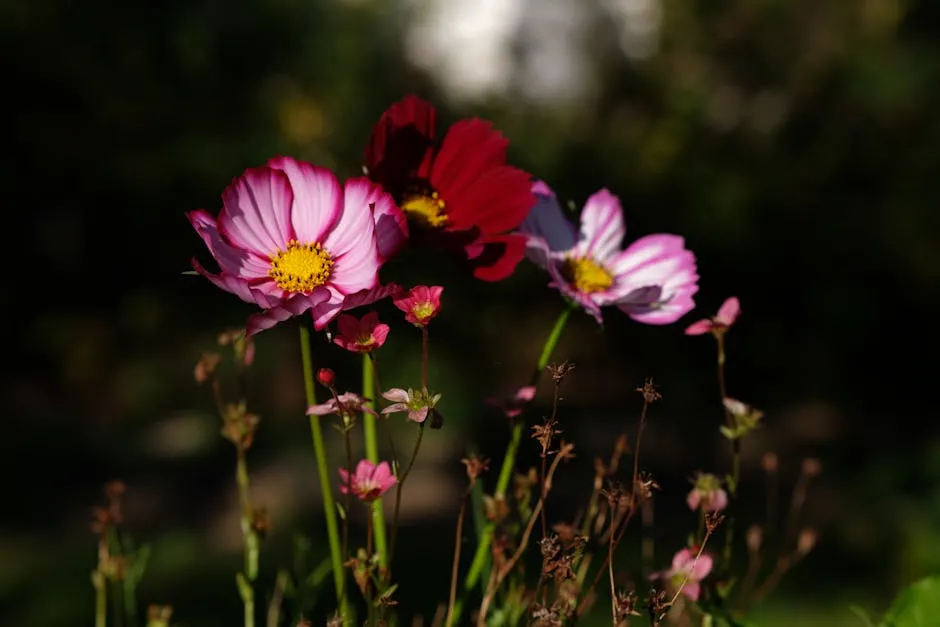
Ranunculus, with their layered petals and rich hues, are a standout choice in both gardening and floral arrangements. These flowers thrive in well-draining soil and prefer full sunlight, making them ideal for spring gardens. In Zone 6, the climate is suitable for growing ranunculus, but understanding the specific conditions is vital for success.
Key factors that influence planting time include local frost dates, soil temperature, and weather patterns. This article will cover these aspects thoroughly, providing you with a clear understanding of how and when to plant ranunculus in your garden.
Expect insights into the characteristics of ranunculus, ideal growing conditions, and practical planting tips. You’ll also learn about the importance of timing and preparation, ensuring your ranunculus flourish beautifully in your Zone 6 garden.
To get started, you’ll need quality Ranunculus Corms (Mixed Colors) that will make your garden pop with color.
Understanding Ranunculus and Its Needs
Characteristics of Ranunculus
Ranunculus flowers are known for their delicate, layered petals and vibrant colors, ranging from white to deep red. Originally native to the Mediterranean, these flowers thrive in cool, moist environments. They prefer a temperate climate, which is why they are popular in spring gardens. Understanding their native habitat helps gardeners create the right environment for successful growth.
Ranunculus has a unique growth cycle. They typically remain dormant during hot summer months but come to life in cooler spring temperatures. This cycle is essential to consider when planning your planting schedule.
Growing Conditions
Ranunculus prefers well-draining soil rich in organic matter. Aim for a pH level between 6.0 and 7.0 to provide optimal nutrient availability. They thrive in full sunlight, needing at least six hours of direct light daily.
Temperature plays a significant role in their growth. Ranunculus can withstand light frost but should be protected from extreme cold. They should be planted when soil temperatures are consistently above 50°F. Understanding the hardiness zones is crucial, as they guide when to plant and how to protect your flowers from unpredictable weather.
By grasping these needs, you can ensure that your ranunculus will grow strong and bloom beautifully in your Zone 6 garden. To keep your soil in check, consider using a Soil pH Tester to ensure your plants get the nutrients they crave.

When to Plant Ranunculus in Zone 6
Timing for Planting
In Zone 6, timing your ranunculus planting is essential for vibrant blooms. The ideal window for planting is from mid-February to early March. This timing allows the corms to establish roots before the growing season begins. If you prefer to plant in the fall, consider late October to early November. This method gives the corms a head start, allowing them to develop before the cold sets in.
However, your local climate can significantly impact these dates. For instance, if you’re near a body of water or in an area with milder winters, you might start planting a bit earlier. Conversely, areas with late frosts may require a delay. Always check the local forecast to ensure the ground is workable and temperatures are above 50°F.
Indoor vs. Outdoor Starting
Starting ranunculus corms indoors can provide several benefits. If you choose this route, soak the corms for 4-6 hours to hydrate them. After soaking, place them in a seed tray with moistened soil, covering them lightly. This method allows for earlier blooms and helps you manage growing conditions more effectively. A Seed Tray with Moisture Control can help maintain the right conditions for your seedlings.
However, starting outdoors has its perks too. If you plant directly in the garden, make sure to wait until the danger of frost has passed. Outdoor planting is more straightforward but depends heavily on weather conditions.
When considering pre-sprouting techniques, indoor starts can give you a jump on the season. Aim for a cool, dark place to encourage root development. A temperature around 50°F works well. Regardless of where you start, frost protection is crucial. Be ready with Frost Cloth for any unexpected cold snaps.

Preparing for Planting
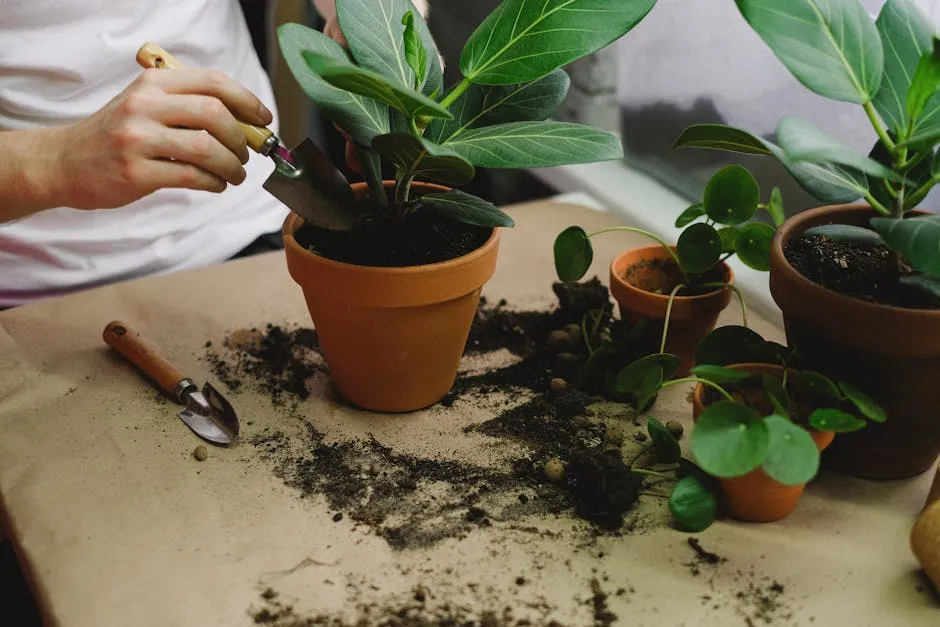
Soaking Corms
Soaking your ranunculus corms is a simple yet effective step. This process helps them absorb water and swell, which promotes healthy growth. Submerge the corms in room temperature water for about 4 hours. Avoid soaking them longer, as this can lead to rot. Ensure they are in a well-ventilated area while soaking, allowing for proper air circulation.
Soil Preparation
Preparing your soil is vital for ranunculus success. Start by loosening the soil and adding organic matter like Organic Compost. This enriches the soil, providing essential nutrients. Good drainage is key, as ranunculus corms can rot in overly wet conditions. Aim for a pH level between 6.0 and 7.0 for optimal growth.
Planting Techniques
When planting, consider depth and spacing. A depth of 2-3 inches is ideal, and space the corms about 6-8 inches apart. This spacing allows for healthy air circulation and room for growth. For visual impact, planting in clusters or rows can create a stunning effect in your garden. Remember, well-spaced plants tend to yield better blooms and are easier to care for.
By following these guidelines, you’ll set the stage for a beautiful display of ranunculus in your Zone 6 garden. Happy planting! And don’t forget to keep your hands protected with some quality Garden Gloves while you dig!
Caring for Ranunculus Post-Planting
Watering and Fertilization
Once your ranunculus are planted, proper watering is essential. These flowers thrive in well-draining soil, so it’s crucial to keep the soil moist but not soggy. Water deeply to encourage strong root growth. Aim for about an inch of water per week, adjusting for rainfall.
But how do you prevent overwatering? One way is to check the soil moisture. Stick your finger about an inch into the soil. If it feels dry, it’s time to water. If it’s still moist, hold off. Overwatering can lead to root rot, which is a common issue for ranunculus.
Fertilization also plays a significant role in their growth. Ranunculus are heavy feeders, so it’s a good idea to apply a balanced fertilizer. Look for one with a ratio like 10-10-10 or 5-10-5. Start fertilizing a few weeks after planting and continue every four to six weeks. Organic options, such as fish emulsion or seaweed extract, work wonders. They not only nourish the plants but also promote healthy blooms. Consider using Organic Fertilizer (10-10-10) for the best results.
Frost Protection
Frost can be detrimental to young ranunculus plants. To protect them, consider using frost cloth or row covers. These materials help to trap heat and insulate the plants during cold snaps. When you know a frost is coming, cover your plants in the evening and remove the covers in the morning when temperatures rise.
Monitoring weather conditions is crucial after planting. Keep an eye on the forecast for unexpected drops in temperature. If you’re unsure about the weather, err on the side of caution. Frost protection is especially vital during early spring when temperatures can fluctuate significantly. Your ranunculus will thank you for the extra care, resulting in vibrant blooms later on.

Harvesting and Post-Harvest Care
When to Harvest
Knowing when to harvest your ranunculus is key for optimal blooms. Look for buds that are colored yet still closed, resembling soft marshmallows when gently squeezed. This is the perfect time to cut them. If the buds feel hard, wait another day or two.
For the best results, harvest in the early morning. This is when the flowers are most hydrated. Use sharp, clean scissors or Garden Shears to make a diagonal cut. This technique allows for better water absorption and extends their vase life, which can last up to two weeks if properly cared for.
Post-Harvest Care
Once harvested, your ranunculus will need some attention. Place them in a clean bucket filled with water right away. It’s essential to keep them out of direct sunlight until you’re ready to arrange them.
For storage, keep the flowers in a cool area. They thrive in temperatures around 34°F to 36°F. If you’re preparing them for a specific event, remember to change the water every couple of days to keep them fresh. Trim the stems slightly before placing them back into water. Following these steps will ensure your ranunculus remain stunning and vibrant for as long as possible.

Conclusion
In this guide, we covered essential tips for planting ranunculus in Zone 6. Timing your planting is crucial, ideally between mid-February and early March. Alternatively, fall planting can also give your corms a head start. Remember to soak the corms and prepare the soil properly for best results. Always consider local climate variations to ensure successful blooms.
Embrace these guidelines to cultivate vibrant ranunculus in your garden. For ongoing support, consider joining a gardening community or resource group. Sharing experiences and tips can enhance your gardening journey! And while you’re at it, why not spruce up your garden with some charming Decorative Planters?

FAQs
What is the best time to plant ranunculus in Zone 6?
The best time to plant ranunculus in Zone 6 is influenced by your last frost date. Typically, you should aim to plant in mid-February to early March. This timing allows the corms to establish roots before the growing season kicks in. If you prefer a fall planting, aim for late October to early November. This gives the corms time to settle before winter. Always check local weather patterns, as slight variations can affect the ideal planting window.
Can I grow ranunculus in containers in Zone 6?
Absolutely! Growing ranunculus in containers is a fantastic option for Zone 6 gardeners. Choose pots that are at least 12 inches deep to accommodate the roots. Use a well-draining potting mix enriched with organic matter. Make sure to soak the corms for a few hours before planting. After soaking, plant them about 2-3 inches deep, ensuring the claw-like ends face down. Place the containers in a sunny spot, and monitor them for moisture, as container plants may dry out faster than those in the ground.
How do I know if my ranunculus corms are healthy?
Healthy ranunculus corms are firm and plump, with no signs of mold or rot. When you receive your corms, examine them closely. They should feel solid and have a slightly shiny surface. If they appear shriveled or mushy, they may be unhealthy. Additionally, look for corms with roots or rootlets starting to emerge; this indicates they’re ready to grow. Always choose high-quality corms from reputable suppliers for the best results.
What should I do if I miss the planting window?
If you miss the ideal planting window, don’t worry! You can still plant ranunculus, but the blooms may not be as robust. If you’re in Zone 6, consider planting as soon as you can work the soil, ideally by late March. Alternatively, you can try to pre-sprout the corms indoors to give them a head start. Ensure they receive plenty of light and warmth. Keep an eye on the weather and be ready to protect them from late frosts.
How can I extend the blooming period of my ranunculus?
To extend the blooming period of ranunculus, consider succession planting. Start new corms every few weeks, staggering the planting dates. This way, while some corms bloom, others are just coming into their growth phase. Additionally, implement proper care practices like regular watering and fertilizing to promote healthy growth. Mulching around the plants can help keep the soil temperature stable, encouraging longer blooming times as well.
Are there any specific pests or diseases to watch out for?
Yes, ranunculus can be susceptible to pests like aphids and thrips. Keep an eye on your plants for signs of infestation, such as curled leaves or webbing. Preventive measures include ensuring good air circulation and maintaining healthy soil. Diseases such as root rot can also occur, particularly if overwatering happens. Make sure your soil drains well and avoid letting the corms sit in water.
Can ranunculus be grown as perennials in Zone 6?
Ranunculus are generally treated as annuals in Zone 6 because they are not reliably hardy. However, some gardeners have had success overwintering them with proper protection, like mulch or covering. If you want to try growing them as perennials, plant them in well-drained soil and provide insulation during harsh winters. Keep in mind that even with these precautions, results can vary based on local climate conditions.
Please let us know what you think about our content by leaving a comment down below!
Thank you for reading till here 🙂 And if you’re looking to get into some fun while gardening, check out this Gardening-Themed Puzzle to challenge your mind while you wait for those blooms!
For best practices in keeping your ranunculus healthy, check out Best practices for watering container gardens.
If you are considering planting in smaller areas, explore container gardening ideas for small spaces to maximize your garden’s potential.
All images from Pexels


