![]()

How to Create Affordable Raised Garden Beds for Beginners
Introduction
Creating your own raised garden beds can be one of the most rewarding and cost-effective ways to start your gardening journey. Not only do these beds elevate your plants to a more manageable height, but they can also improve drainage and soil quality. Whether you have a green thumb or are just starting, building your own raised garden beds can be done on a budget—without sacrificing quality or aesthetics.
Picture this: You step into your backyard, and instead of a barren patch of earth, you see beautifully constructed raised beds bursting with fresh vegetables. What a delight! Raised beds can transform your outdoor space into a thriving garden oasis. Plus, they offer a practical solution for those with limited mobility. No more bending low to the ground; just a simple reach for those juicy tomatoes or aromatic herbs.
In this guide, we’ll walk you through step-by-step instructions, tips, and tricks to help you create the perfect raised garden beds for your backyard. We’ll cover everything from material selection to filling your beds with the right soil mix. So grab your tools, put on your gardening gloves, and let’s dig in!

Summary of Key Points
In this article, you will learn how to create affordable raised garden beds that fit your budget and gardening needs. We’ll explore the benefits of raised beds, including their ability to reduce soil compaction and improve drainage. You’ll discover tips on selecting the right materials, such as untreated wood, and how to fill your beds for optimal plant growth.
Additionally, we’ll provide a detailed, step-by-step tutorial on building your own raised beds, including measurements and materials needed. By the end of this article, you will have all the tools you need to create your own beautiful, productive raised garden beds—all while keeping costs low. Just think of all the fresh veggies you can grow, from cucumbers to peppers, right in your backyard! And for those who want to keep their plants thriving, consider using organic fertilizers to boost your soil’s nutrient profile!
Creating a successful garden is not just about planting; it’s about understanding the right techniques and materials. So, whether you’re a seasoned gardener or a novice, this guide will help you cultivate a thriving space close to nature. Let’s get started on your gardening adventure!
Benefits of Raised Garden Beds
Raised garden beds are like little islands of green brilliance. They offer a treasure trove of benefits that make gardening a joy. Let’s break down why you should consider them for your backyard haven.
Improved Soil Quality: Since you control the soil, you can mix in nutrient-rich compost and organic materials. This results in healthier plants and better yields. It’s like giving your plants a five-star buffet! To maintain that soil quality, consider using organic compost to enrich your garden beds.
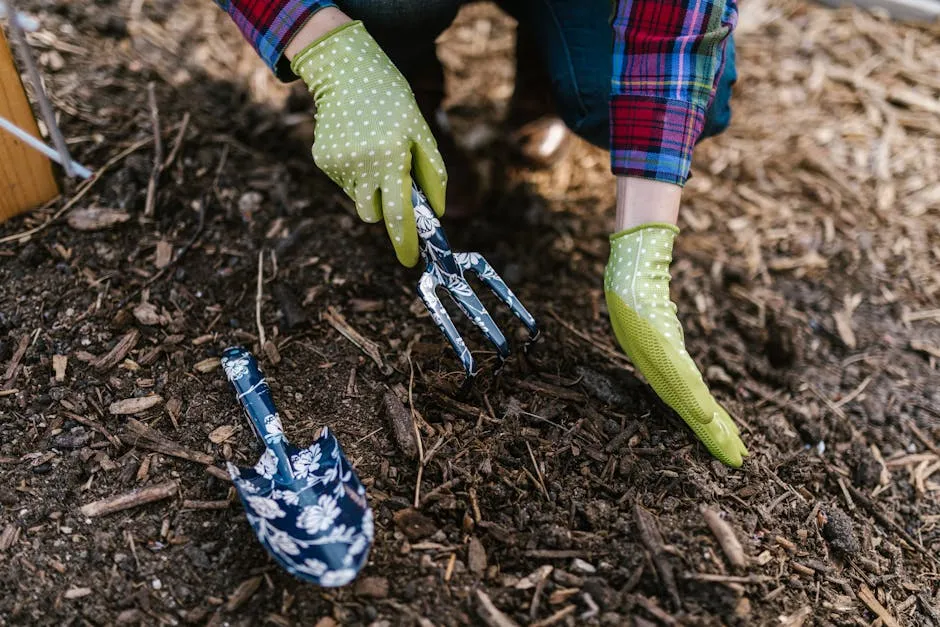
Easier Maintenance: No more back-breaking work! Raised beds are elevated, reducing the need for bending and kneeling. This makes it easier on your joints and allows you to garden comfortably. You can tend to your veggies without feeling like you just ran a marathon. And don’t forget to protect your hands with a pair of garden gloves—your hands will thank you!
Better Drainage: Water drainage is crucial for plant health. Elevated beds prevent waterlogging by allowing excess moisture to escape easily. Say goodbye to soggy roots, which can lead to root rot. Your plants will thank you!
Extended Growing Season: The soil in raised beds warms up faster in spring, meaning you can plant earlier. This gives you a head start on the growing season. Picture harvesting tomatoes while your neighbors are still preparing their plots!
Reduced Weeds: Weeds are like that uninvited guest who overstays their welcome. With defined borders, raised beds make it easier to control weeds. You’ll spend less time weeding and more time enjoying your bountiful harvest.
In short, raised garden beds simplify gardening while enhancing plant health. With all these benefits, it’s no wonder they’ve become a popular choice among gardeners of all levels. So grab your tools and let’s get planting!
Choosing the Right Materials
When it comes to building raised garden beds, the materials you choose can make or break your project. Let’s dive into the best options available.
Types of Wood
Cedar: This wood is a gardener’s best friend. Naturally rot-resistant, it lasts longer than most materials. Plus, it’s affordable, making it a popular choice for many DIY enthusiasts. You can find great deals on cedar fence pickets online!
Redwood: If you’re looking for durability, redwood is your go-to. It’s resistant to decay but comes with a higher price tag. Think of it as the luxury option for your garden!
Douglas Fir: On a budget? Douglas fir is your pal! It’s cheaper than cedar or redwood but may not last as long. Still, it can serve you well for several years.
Avoid Pressure-Treated Wood: This type of wood contains chemicals that can leach into the soil and harm your plants. Stick to untreated varieties to keep your garden organic and safe.

Alternative Materials
Bricks and Stones: Want a rustic look? Upcycled bricks and stones can create a visually appealing raised bed. They’re durable and can withstand the test of time.
Metal Tanks: If longevity is your priority, consider using metal tanks. They provide excellent drainage and can last for decades. Just make sure to line the inside to protect the soil.
Wooden Pallets: A low-cost, eco-friendly option if you can find them! Just ensure they’re not chemically treated. You can repurpose these pallets to create charming raised beds with a bit of creativity.
Choosing the right materials is key to building sturdy and lasting raised garden beds. Whether you opt for wood, stone, or metal, each choice has its unique charm and benefits. Now, let your creativity flow as you plan your garden masterpiece!

How Deep Should a Raised Garden Bed Be?
When it comes to raised garden beds, depth matters. Most plants thrive in beds that are 6 to 12 inches deep. This range provides ample room for roots to develop without feeling cramped.
Now, if you’re considering root vegetables like carrots or potatoes, you might want to go deeper. Carrots, for instance, prefer at least 12 inches to grow long and straight. Potatoes, on the other hand, will need even more space to spread out beneath the soil.
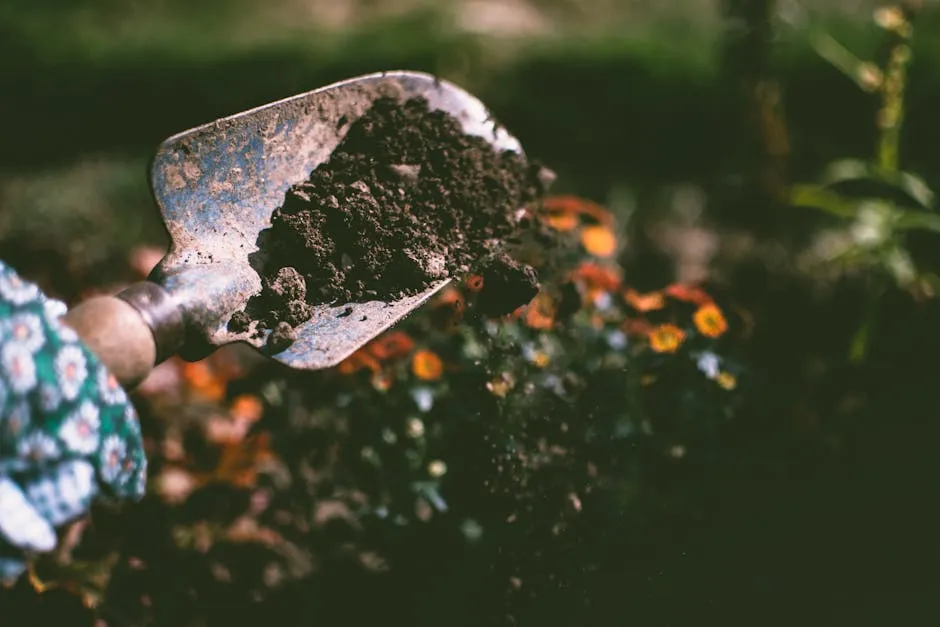
But wait, there’s more! Layering your raised bed can boost drainage. Start with a base layer of coarse materials like small stones or straw. This helps excess water escape, preventing root rot. Follow it up with a mix of quality topsoil and compost for rich nutrients. You can find quality topsoil online to get you started!
Remember, the right depth can make a world of difference in your gardening success. So, before you hammer that first nail, think about what you want to grow and adjust your raised bed depth accordingly. Happy planting!
Step-by-Step Tutorial: Building Your Affordable Raised Garden Bed
Creating your own raised garden bed is easier than you think! Follow these steps to build a sturdy, affordable structure that will serve your gardening needs for years to come.
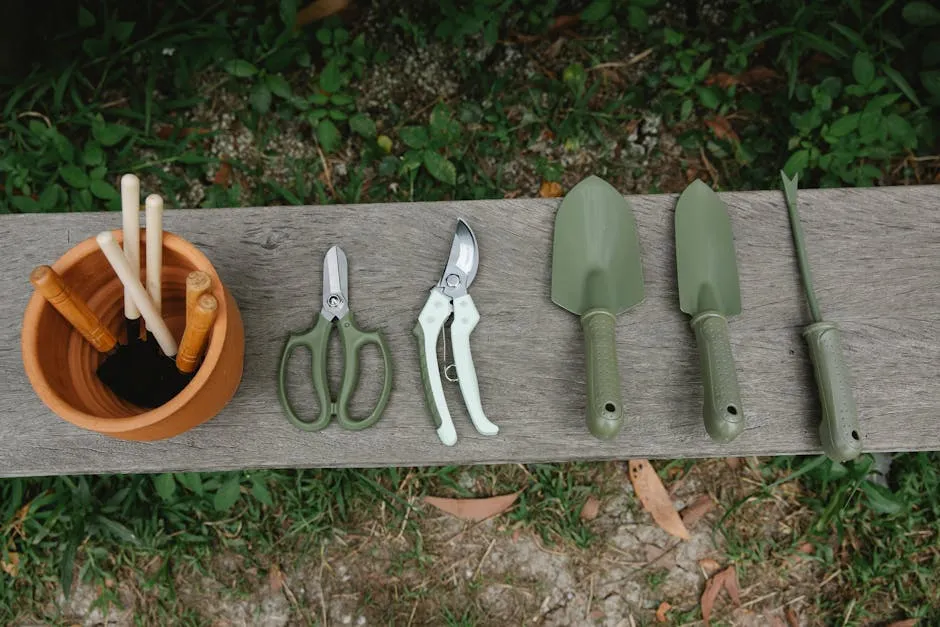
Materials and Tools Needed
To get started, gather the following materials:
- Cedar fence pickets: 6 pieces, each 6 feet long (approx. $18 total).
- Screws: 1.5-inch exterior screws (around $5).
- Wood drill: For driving in screws. A good wood drill can save you time and effort!
- Saw: A circular saw or hand saw will do the trick.
- Measuring tape: To ensure accurate cuts.
- Level: To keep your bed even.
You can often find cedar fence pickets at your local hardware store for about $3 each. This makes them an economical choice for building a raised garden bed.
Step 1: Planning Your Garden Bed
Start by measuring your available space. Decide on the dimensions of your garden bed; a popular size is 4 feet by 8 feet. Sketch a simple design to visualize how it will fit in your yard. Ensure you have adequate walking space around your garden bed for easy access.

Step 2: Cutting the Wood
Now, it’s time to cut your wood! For a standard 4×8 raised bed, you’ll need:
- Two pieces of wood at 4 feet (for the ends).
- Two pieces at 8 feet (for the sides).
Make sure to double-check your measurements before cutting. You want those pieces to fit together like puzzle pieces! Avoid common mistakes by using a straight edge for your cuts, ensuring they’re clean and even.

Step 3: Assembling the Frame
Start assembling your frame on a flat surface. Lay out the long sides parallel to each other, then attach the short ends. Here’s a simple step-by-step:
- Place a 4-foot picket at each end of the two 8-foot pickets.
- Drill pilot holes to avoid splitting the wood.
- Secure with screws at each corner, using at least 4 screws for stability.
- Double-check that everything is square using a level.
For added support, you can install corner brackets inside the frame. This prevents bowing and keeps your structure intact. Check out these raised garden bed corner brackets for extra stability!
Congratulations! Your raised garden bed frame is now complete. With a little bit of effort and some basic materials, you’re well on your way to growing your own fresh produce. Just imagine the delicious veggies you’ll harvest! Stay tuned for the next steps on installing and filling your raised bed for optimal growth.

Step 4: Installing Your Raised Bed
Alright, let’s get this raised garden bed in place! First, you’ll want to ensure that your bed is level. No one wants a slanted salad bar, right? Begin by selecting a flat piece of land that gets plenty of sunlight. If your yard is uneven, grab a shovel and start leveling.
Once your ground is as flat as a pancake, position your raised bed frame. Use a level to check both the length and width. If one side is too high, simply dig it down a bit. If it’s too low, add some soil underneath. Trust me, a level bed means happier plants.
After leveling, ensure your raised bed is positioned where it will get ample sunlight. Most vegetables love the sun—think of it as their morning coffee! Keep it away from heavy foot traffic, too. The goal is to create a cozy, inviting spot for your plants. And to keep things tidy, consider using a garden cart for easy transport of soil and plants!
Step 5: Filling the Raised Bed
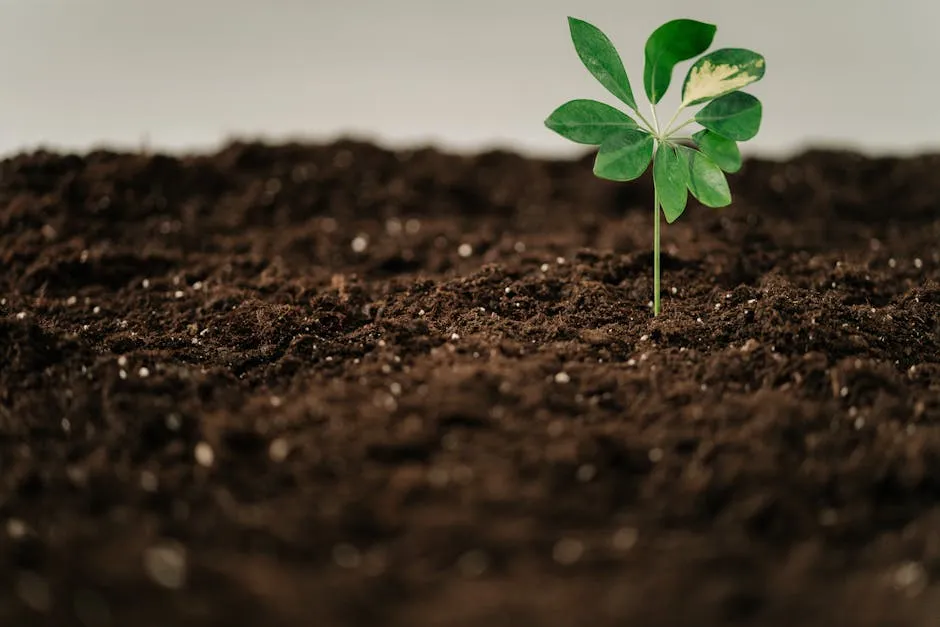
Now that your bed is installed and level, it’s time to fill it up! The right soil mix is crucial for happy plants. Start with a blend of topsoil and compost. Aim for a mix that’s about 50% of each. This combo provides excellent drainage and nutrients, creating a fantastic environment for your plants to thrive.
If you’re feeling adventurous, consider adding some organic matter like shredded leaves or grass clippings. They break down over time and enrich the soil further. Adding a soil moisture meter can help you keep track of your soil’s hydration levels!
Before you fill your bed, it’s wise to lay down a layer of cardboard or newspaper at the bottom. This helps suppress weeds while allowing earthworms to come and go freely. Once you have your base ready, start pouring in that nutrient-rich soil mix. Fill it to about an inch below the top edge to prevent soil from spilling over when you water.
And voilà! Your raised bed is now ready for planting. Get those seedlings in there and watch your garden flourish!
Planting Ideas for Your Raised Garden Beds
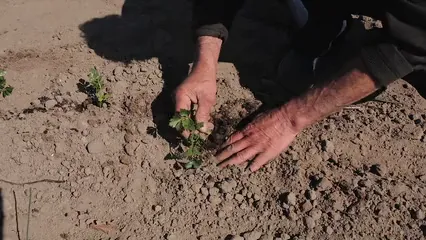
Ready to get planting? Let’s talk about some beginner-friendly plants that are perfect for your raised garden beds! Tomatoes, lettuce, peppers, and herbs are fantastic options. They’re not just easy to grow; they also provide delightful flavors for your meals.
Tomatoes love the sun, so plant them toward the back of your bed where they’ll bask in sunlight. Lettuce is quick to sprout, making it a great choice for impatient gardeners. As for peppers, they come in various colors and add a pop of fun to your garden. And don’t forget herbs! Basil, parsley, and cilantro are excellent for adding fresh flavor to your dishes. Consider using a herb planter to keep your herbs organized!
Seasonal planting is key to maximizing your yield. Start with cool-weather crops like lettuce and peas in early spring. As the weather warms, transition to heat-loving plants like tomatoes and peppers. In fall, consider planting garlic or overwintering crops like kale. This rotation keeps your garden productive year-round.
By mixing up your plant choices and timing, you’ll have a garden that’s not just beautiful but also bountiful!

Maintaining Your Raised Garden Beds
Now that your garden beds are bursting with life, let’s keep them thriving! First and foremost, watering is essential. Raised beds tend to dry out faster than traditional gardens, so check moisture levels frequently. Aim to water deeply but less often to encourage deep root growth. A good rule of thumb? About an inch of water per week.
Drainage is another biggie. If you notice standing water after a rainstorm, consider adding more organic matter to improve soil structure. Good drainage helps prevent root rot and keeps your plants happy.
Next up: fertilization. Use organic fertilizers like compost or well-rotted manure to keep your soil nutrient-rich. Apply it in the spring before planting and again mid-season. Your plants will thank you with healthy growth and vibrant blooms! If you’re looking for easy ways to manage pests, check out this pest control spray to keep unwanted visitors away!
Lastly, seasonal care is crucial. In spring, clear out any dead plants and debris to make way for new growth. During summer, keep an eye out for pests. Handpick any unwanted guests, or use organic pest control methods. And in fall, prepare your beds for winter by adding a layer of mulch to insulate the soil and prevent erosion. Don’t forget to grab some mulch for gardens to protect your plants during the colder months!
With a little love and attention, your raised garden beds will flourish, providing you with fresh produce and a sense of accomplishment. Happy gardening!

Conclusion
Building your own raised garden beds is a fantastic way to start growing food while keeping expenses down. You don’t need to break the bank to create a thriving garden! With just a few materials and some effort, you can craft beautiful, functional beds that will yield delicious produce for years to come.
Imagine stepping into your backyard and being greeted by stunning rows of vegetables and flowers. Raised beds not only look good but also provide the right environment for your plants to flourish. They offer better drainage, reduced weeds, and easier access for maintenance. It’s like giving your plants a VIP experience!
So, gather your supplies, roll up your sleeves, and follow the steps outlined in this guide. Whether you choose cedar, bricks, or even repurposed materials, your DIY raised beds will be a point of pride. Enjoy the sheer joy of planting seeds, nurturing them, and eventually harvesting your bounty. If you’re interested in more gardening advice, consider checking out gardening books to expand your knowledge!
FAQs
What type of wood should I use for a raised garden bed?
Go for untreated wood like cedar or redwood. These types are naturally rot-resistant and safe for your plants.
How deep should my raised bed be?
A depth of 6 to 12 inches is ideal. Adjust based on the plants you wish to grow, as some need more room for their roots.
Can I use bricks or stones for raised beds?
Absolutely! Bricks and stones provide a sturdy and attractive option for building raised garden beds.
How do I fill my raised bed?
Fill it with a mix of topsoil, compost, and organic matter. This combination ensures your plants get the nutrients they need.
What can I grow in my raised garden bed?
A wide variety of plants thrive in raised beds, including vegetables, herbs, and even flowers. Some favorites are tomatoes, peppers, and basil!
To ensure your plants thrive, consider using best organic fertilizers for vegetable gardens in small spaces.
Please let us know what you think about our content by leaving a comment down below!
Thank you for reading till here 🙂
All images from Pexels


