How to Build a Self-Watering Container Garden
Introduction
Self-watering container gardens are a gardener’s best friend. They simplify the watering process, making plant care easier and more efficient. Imagine not having to remember to water your plants every day—sounds dreamy, right? This gardening method maintains consistent moisture levels, allowing plants to thrive without constant attention. It’s perfect for busy folks or those who often forget about their leafy companions.
This article aims to guide you through building your very own self-watering container garden. You’ll discover how to create a system that conserves water, supports healthy growth, and suits various plants. Get ready to transform your gardening experience, making it less of a chore and more of a joy!
Benefits of Self-Watering Container Gardens
Self-watering container gardens come with a treasure trove of benefits. Let’s break them down:
Water Conservation: These clever systems reduce water waste. The reservoir design allows plants to draw water as needed. So, instead of drowning your plants with excess water, they sip at their own pace. This method is eco-friendly and wallet-friendly, helping you save on those pesky water bills.
Healthier Plants: Consistent moisture is a game changer for plant health. When roots have steady access to water, they grow stronger and produce better yields. You’ll notice lush foliage, vibrant flowers, and juicy fruits—who wouldn’t want that?
Ease of Use: Perfect for urban dwellers or anyone juggling a busy schedule. Set it up, and let it do the work. You can travel without worrying about your plants wilting away. It’s like having a personal gardener on standby!
Versatility: From herbs to vegetables and flowers, self-watering containers accommodate a variety of plants. You can customize your garden to suit your tastes, whether you’re craving fresh basil for pasta or colorful blooms for your balcony.
In short, self-watering container gardens offer a practical, efficient solution for maintaining your green oasis. So, roll up your sleeves and get ready for a gardening adventure that simplifies your life and delights your senses!
Materials Needed
Building a self-watering container garden is easier than you might think! Here’s what you need to gather to get started.

Essential Supplies
1. Containers: Choose containers that suit your style and space. Plastic bins, buckets, or even decorative pots work well. Just make sure they don’t have drainage holes at the bottom. You want a reservoir, not a flood! For stylish options, check out these decorative ceramic flower pots.
2. Soil Mixture: A good potting soil is crucial. Opt for a mix of potting soil and vermiculite. This combination helps retain moisture without becoming soggy. Your plants will thank you! You can find a great organic potting soil mix here.
3. Watering Mechanism: You’ll need a way to deliver water to your plants. PVC pipes are a popular choice. They allow water to flow to the roots. Alternatively, wicking materials like cotton ropes or strips of landscape fabric can soak up water from the reservoir. Consider using PVC pipes for gardening to simplify this process.
4. Liner Materials: To prevent soil from falling into the water reservoir, use either a pond liner or landscape fabric. These materials create a barrier while allowing moisture to pass through. Happy plants, happy gardeners! For an efficient solution, check out this waterproof pond liner.
Tools Required
Now, let’s talk tools. Here’s what you’ll need to construct your container garden:
1. Drill: A power drill is essential for creating drainage and filling holes. If you want to get fancy, use a drill bit suitable for making larger holes for your watering pipes. Get a versatile drill set with various drill bits for your projects.
2. Saw: A handsaw or jigsaw will help you cut your containers or pipes to the right size. You want everything to fit snugly. If you prefer a more efficient cut, consider using a handsaw for cutting containers.
3. Measuring Tape: Accurate measurements are key. This tool ensures your containers and components fit together perfectly. You can grab a reliable measuring tape for this task.
4. Utility Knife: This handy tool can help you make quick cuts in liner materials or adjust the size of your containers. An all-purpose utility knife can be a gardener’s best friend.
5. Optional Tools: If you’re feeling ambitious, a miter saw or a pipe cutter can make life easier. These tools can provide cleaner cuts, especially for wood or PVC pipes. Having a quality drill set can really elevate your DIY game!
Gathering the right materials and tools sets the foundation for your self-watering container garden. With everything in place, you’ll be well on your way to enjoying lush plants with minimal effort!
Step 1: Choosing the Right Container
Selecting the right container is the first step to success! You can use various materials for self-watering systems, and each has its own quirks.
Plastic Containers: These are budget-friendly and lightweight. They come in various sizes, making them perfect for herbs or larger vegetables. However, they may not be as durable in extreme weather, so you might need to replace them occasionally.
Wooden Planters: If you’re looking for aesthetics, wooden containers can add charm to your garden. Cedar and redwood are great options, as they resist rot. Just remember, they can be heavy and require more maintenance.
Ceramic or Terracotta Pots: These beauties are great for aesthetic appeal and provide excellent breathability. However, they can crack if left outside during winter, so they’re best suited for indoor use or warmer climates. Enhance your collection with terracotta planters for that classic garden look.
Ultimately, consider your budget, the size of your garden, and the aesthetic you want to achieve. Choose wisely, and your plants will be grateful!
Step 2: Preparing the Container
Now that you’ve chosen your container, it’s time to prepare it for self-watering magic. Start by designing the reservoir—this is where the water will hang out.
Creating a Reservoir
First, ensure your container has a solid base. For plastic containers, cut a hole about an inch above the bottom. This hole allows excess water to drain out if it gets too full. If using a wooden planter, drill a drainage hole to prevent flooding.
Next, place a layer of gravel or small stones at the bottom. This layer will help with drainage and prevent soil from clogging the hole. It’s like a cozy bed for your plants, ensuring they don’t drown!
Lastly, make sure to seal any cuts with a waterproof liner if necessary. This step prevents leaks and ensures water stays put, allowing your plants to thrive. If you’re looking for a reliable choice, consider a landscape fabric for wicking system.
Step 3: Adding the Wicking System
Time to get wicking! This step is vital for delivering water to your plants. You can use various materials, like PVC pipes or fabric strips, for this.
If using PVC, cut a pipe to fit vertically in your container. Drill holes along the sides to allow water to seep out. This pipe will act as a watering tube, making sure your plants get a sip when needed.
Alternatively, you can use a fabric wick. Cut a strip of landscape fabric or cotton rope, letting one end dangle into the reservoir. The other end should be buried in the soil. This method utilizes capillary action, drawing water up as the soil dries. It’s like a tiny lifeline for your plants!
Ensure the wicking system is secure and positioned correctly before moving on. Your plants will appreciate your efforts! For those who want to keep it simple, consider investing in a Indoor Herb Garden Kit.
Step 4: Filling with Soil
Now comes the fun part—filling your container with soil! Start with a good quality potting mix, which retains moisture without becoming compacted.
Layer your soil carefully. First, add a layer of soil around the wicking system, allowing it to settle. This will ensure the soil has direct contact with the wick for efficient water transfer.
Next, fill the rest of the container with soil, leaving a couple of inches at the top. This space allows for water and prevents overflow. Give the soil a gentle pat to eliminate air pockets.
Once filled, give it a good watering. This initial soak helps the soil settle and establishes a connection with the wicking system. Your container is now ready for plants! Don’t forget to consider using plant food fertilizer to boost growth!
Step 5: Planting
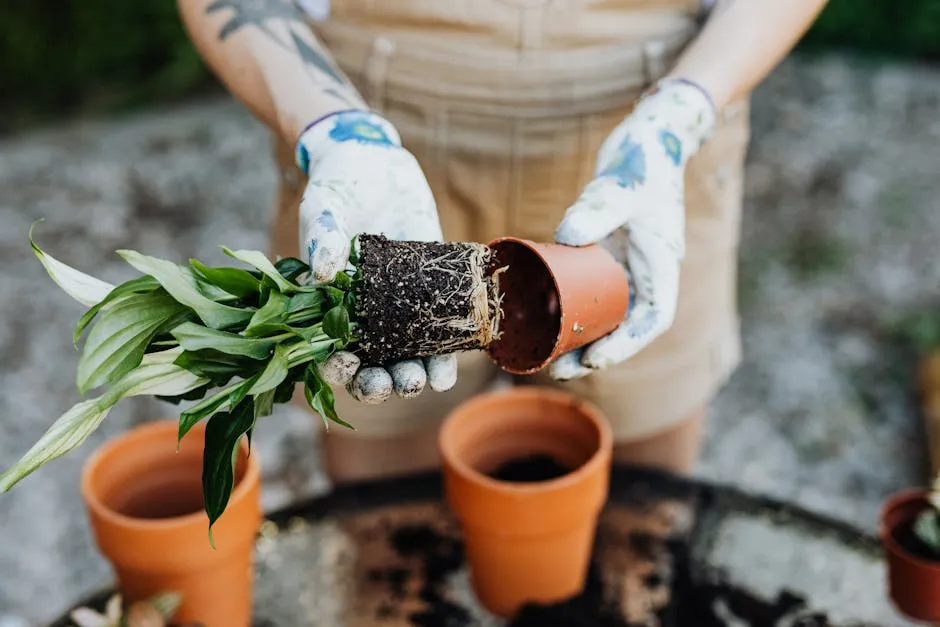
Choosing the right plants is crucial for your self-watering container garden! Opt for varieties that thrive in moist conditions, like herbs, tomatoes, or leafy greens.
When planting, ensure that roots make direct contact with the soil. This contact helps them access the moisture they need. Dig a small hole, place your plant, and cover the roots with soil. Pat down gently to eliminate air pockets.
After planting, give them a good drink of water through the watering tube. This initial watering helps establish roots in their new home. You might also want to keep track of your plants’ progress with a garden journal for tracking growth.
Keep an eye on your plants, and enjoy watching them flourish in their self-watering paradise! Happy gardening!
Step 6: Maintenance Tips
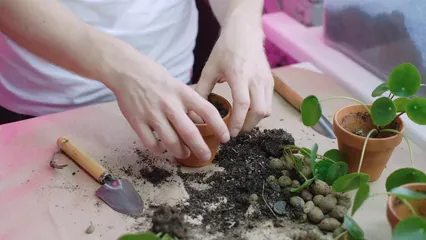
Maintaining your self-watering container garden is key to thriving plants. First, regularly check the water level in the reservoir. If it gets low, simply refill it through the watering tube. This ensures your plants have the hydration they crave.
Next, monitor the soil moisture. Stick your finger about an inch into the soil. If it feels dry, it’s time to water from the top. This helps establish strong roots, especially for younger plants.
Also, keep an eye out for any debris or algae that might form in the reservoir. A quick clean every few months can prevent clogs. Remember, a happy garden equals happy plants!
Common Mistakes to Avoid
Building a self-watering container garden is a fantastic project, but there are pitfalls to dodge. Here’s a list of common mistakes and how to circumvent them.
Overfilling the Reservoir: One major misstep is overfilling the reservoir. This can lead to waterlogged soil and root rot. Always leave about an inch of space at the top. Your plants should sip, not drown!
Wrong Soil Choice: Using heavy garden soil is another common error. Opt for a lightweight potting mix instead. This promotes proper drainage and aeration, giving roots the breathing room they need.
Ignoring Drainage Holes: Some gardeners forget to drill drainage holes. This can cause water to pool, leading to unhappy plants. Make sure your design includes overflow holes to keep things in check.
Neglecting Maintenance: Don’t skip regular checks! If you ignore your garden, it may suffer. Check water levels and soil moisture at least once a week.
Mold Growth: Mold might appear if conditions are too humid. To combat this, ensure adequate airflow and avoid overwatering. You can also remove any affected plants promptly.
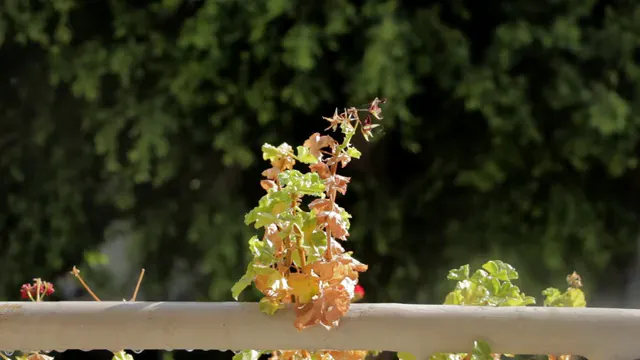
Plant Wilting: If your plants start wilting, it could mean the soil is too dry or too wet. If dry, give them a good watering through the top. If wet, let the reservoir drain before adding more water.
By avoiding these common mistakes, you’ll set your self-watering container garden up for success. Happy gardening!
Conclusion
Building a self-watering container garden is a game changer. It not only conserves water but also promotes healthier, happier plants. Imagine enjoying lush greens and vibrant blooms with minimal effort.
This system frees you from the daily watering grind, offering peace of mind, especially during vacations. Plus, you can grow a variety of plants, from herbs to vegetables, all in one place.
So, why not take the plunge? With a little time and effort, you can create your own self-watering oasis. Embrace the joy of gardening while enjoying the benefits of this efficient system. Your plants—and your busy schedule—will thank you!
FAQs
What plants are best for self-watering containers?
When it comes to self-watering containers, some plants simply thrive! Think of herbs like basil, parsley, and mint. These guys love consistent moisture and are perfect for your kitchen garden. Vegetables also enjoy this setup. Tomatoes, peppers, and leafy greens like spinach or lettuce can flourish in self-watering containers. Their roots stay hydrated, leading to robust growth and juicy yields. For flowers, go for petunias, marigolds, or geraniums. They appreciate the steady water supply and brighten up your space beautifully. Remember, choose plants that enjoy moist soil conditions to make the most of your self-watering system!
How often should I check the water level?
Monitoring water levels is crucial for happy plants! Ideally, check the reservoir weekly. Depending on your climate, you might need to adjust this. In hot weather, your plants may drink more, so be vigilant. Stick your finger about an inch into the soil. If it feels dry, it’s time to refill. If it’s still moist, hold off. Remember, keeping a consistent water level is key for healthy roots and flourishing plants!
Can I use self-watering containers indoors?
Absolutely! Self-watering containers are perfect for indoor gardening. They help maintain moisture, making plant care easier, especially for forgetful waterers. Just ensure your chosen container fits your space and has a good drainage system. Place it near a window with adequate sunlight. Happy plants lead to a happy home, and you can enjoy fresh herbs or beautiful flowers all year round!
What should I do if my plants are wilting?
Wilting plants can be alarming! First, check the soil moisture. If it’s dry, give your plants a good drink through the watering tube. If the soil is soggy, you might have overwatered. Let the reservoir drain and hold off on watering until the soil dries a bit. Also, inspect for pests or diseases, as they can cause stress. Act swiftly, and your plants will bounce back in no time!
How do I prevent algae growth in my self-watering container?
Algae can be a pesky problem! To keep it at bay, ensure your planter has good drainage and airflow. Cover the soil surface with mulch to block sunlight, which algae love. Clean the reservoir periodically to remove any buildup. If algae appear, simply scrub it off with a soft brush. Keeping your container clean and well-maintained helps prevent this green invader from taking over your garden!
Please let us know what you think about our content by leaving a comment down below!
Thank you for reading till here 🙂
All images from Pexels
